
Securing Azure Containers and Blobs with Managed Identities
I’ve been streaming ‘Coding with JoeG’ on Twitch for a few months now. The general theme of the stream is teaching software development with C#. We’ve been building a contact management application to demonstrate some best practices. About two weeks ago, or so, I added an Azure Storage Blob Container to hold the images of the contacts. I did this using the way I knew how to do it using Storage Access Keys and a library, JosephGuadagno.AzureHelpers.Storage, that I wrote to make it ‘easier’ to interact with Azure Storage. While talking about the stream on Twitter, Christos, PM on the Microsoft Identity team, reached out and said I should try securing the Container/Blob with Managed Identity. I tried on the stream for a good 5 or so hours and could not get it to work. If you want to see it, check out the recording of the stream on my YouTube channel.
- Security Azure Blob Using Microsoft Identity Part 1
- Security Azure Blob Using Microsoft Identity Part 2
- Security Azure Blob Using Microsoft Identity Part 3
- Security Azure Blob Using Microsoft Identity Part 4
- Security Azure Blob Using Microsoft Identity Part 5
Well, I was playing around yesterday after reading the Azure SDK - Azure Identity August 2020 General Availability Release notes, wow that is a long title! ![]() , and I got it to work!
, and I got it to work! ![]()
The basic steps are:
- Register an application with Azure
- Assign a role to that application. More on this later.
- Allow that application access to the container.
- Pass the identity of the application to the Azure SDK or JosephGuadagno.AzureHelpers.Storage.
- Celebrate your secure connection!
But before we talk about securing Azure Storage Blob Containers, let’s look out what Azure RBAC is. Azure RBAC, or Azure Role-Based Access Control, is an authorization system built on Azure Resource Manager that provides fine-grained access management of Azure resources. It allows you to create roles or use predefined roles for your applications. Azure Storages has many predefined roles. The Azure Storage Container ones are as follows:
| Role | Description |
| Storage Blob Data Owner | Use to set ownership and manage POSIX access control for Azure Data Lake Storage Gen2. For more information, see Access control in Azure Data Lake Storage Gen2. |
| Storage Blob Data Contributor | Use to grant read/write/delete permissions to Blob storage resources. |
| Storage Blob Data Reader | Use to grant read-only permissions to Blob storage resources. |
| Storage Blob Delegator | Get a user delegation key to use to create a shared access signature that is signed with Azure AD credentials for a container or blob. |
| Storage Queue Data Contributor | Use to grant read/write/delete permissions to Azure queues. |
| Storage Queue Data Reader | Use to grant read-only permissions to Azure queues. |
| Storage Queue Data Message Processor | Use to grant peek, retrieve, and delete permissions to messages in Azure Storage queues. |
| Storage Queue Data Message Sender | Use to grant add permissions to messages in Azure Storage queues. |
Registering the Application
The first step in getting authentication working for your application is registering the application with Azure. There are two different ways to register your application. I’ll show you both ways here.
Azure CLI
If you don’t have the CLI installed and you prefer the command, check out the installation instructions.
To register your application with Azure using the Azure CLI, open up Terminal, Bash, Command Prompt, ITerm, or whatever your preferred command prompt is.
First, you need to log in with the command line.
1

az login
After you are logged in, the next step would be to create the Azure Active Directory service principal. This registers the application. You can use the ad sp command, which stands for ‘Active Directory’ ‘Service Principal’. We are going to use create-for-rbac sub-command Documentation.
The command looks similar to this.
1
2
3
4

az ad sp create-for-rbac `
  --name "<name>" `
  --role "<role>" `
  --scopes /subscriptions/<scope-subscription>/resourceGroups/<scope-resource-group>/providers/Microsoft.Storage/storageAccounts/<scope-resource-storage>
NOTE This should be entered in one line, or use the backtick
Replace the following ‘tokens’ with your actual values
| Name | Description |
name |
The name for the application |
role |
The Azure Active Directory role you want to assign to this application |
scope-subscription |
The subscription id of you Azure subscription |
scope-resource-group |
The resource group that the storage container belongs to |
scope-resource-storage |
The Azure Storage container you want to grant access to |
Since the name and role can contain spaces, you should wrap them in double quotes (“).
Assuming you have the authorization and syntax-correct, the call will return a JSON file that looks like this:
1
2
3
4
5
6
7

{
  "appId": "6c04f5c5-97f7-486d-bbb2-eeeeeeeeee",
  "displayName": "HelpersTestRole",
  "name": "https://HelpersTestRole",
  "password": "QPxyBvw3.UE8Bw6AJAt63pWx~BB40deded",
  "tenant": "bee716cf-fa94-4610-b72e-5df4bf5a9999"
}
Note I’ve changed the values here from the values I received.
At this point, you’ll want to save values of the appId, password, and tenant. Once you close your terminal you will now be able to retrieve the password again.
You can find more about this approach on Azure Documentation site
Azure Portal
If you are like me, you like to do most of the work in the portal, although I find myself using the command line more. Let’s take a look at registering your application with the portal.
Register the Application
Start off with signing into the portal and navigate to your Azure Active Directory. Look for the ‘App Registrations’ blade in the menu on the left and click on it.
Click on ‘+ New registration’
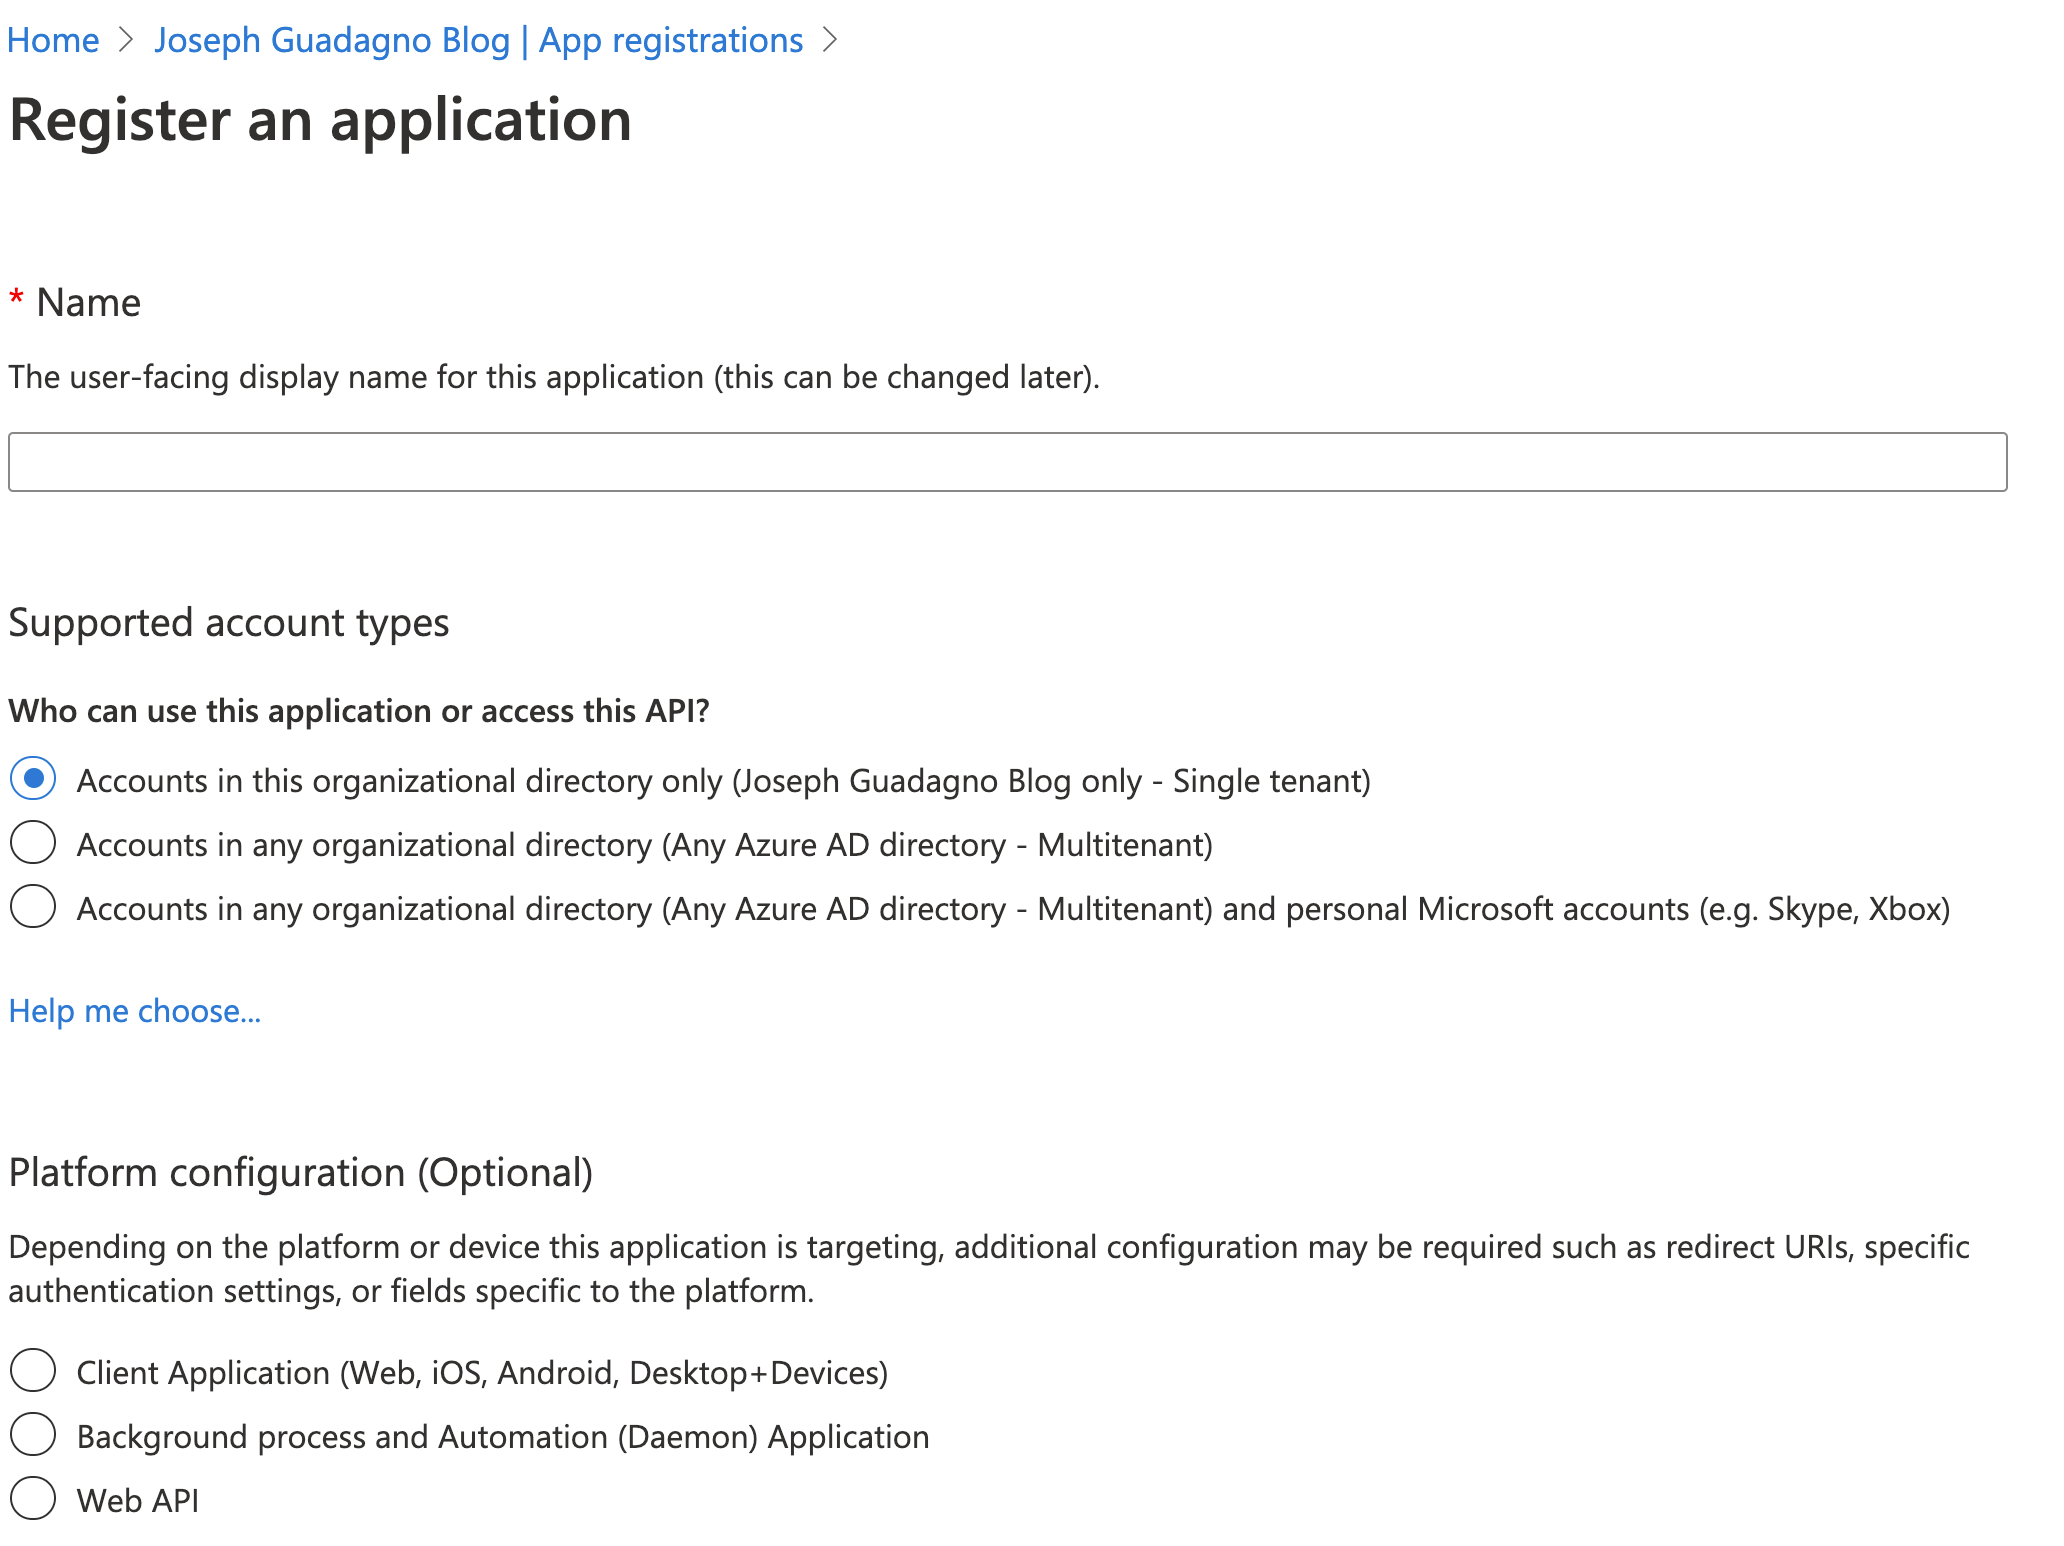
| Name | Value | Description |
| Name | my application |
The name you want to identify with this application |
| Supported account types | Accounts in any organization... |
Chose the type that fits your needs |
| Redirect URI (Optional) | This is required if you are going to be using the application to sign in. I’m leaving this blank for local development |
- Click ‘Register’
You will be presented with the information around the application. Copy down the ‘Application (client) ID’ and the ‘Directory (tenant) ID’ for use later.

- Find the ‘Certificates & secrets’ link on the menu on the left and click it.
- Click ‘+ New client secret’
- Add a description. The Azure CLI names it
rbacbut I don’t think the name matters. - Chose an expires in option.
- Copy the value.
NOTE This is your only opportunity to copy it. If you don’t, you will need to recreate it.
Assign the Role
Now we need to assign a role to the application which allows the application to use the Azure Storage container.
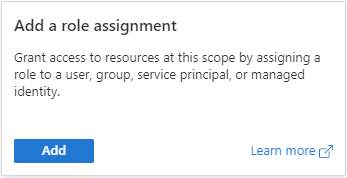
Navigate to the container that you want to provide access and click on ‘Access control (IAM’) on the left menu.
There are two ways to add the role. Option 1, click the ‘+ Add’, then ‘Add role assignment’. Option 2, click the ‘Add’ button.
Enter the following:
| Name | Value | Description |
| Role | Storage Blob Data Contributor |
Add what makes sense for your application. Not sure what setting to use, hover over the ‘i’ or check out the permissions mentioned earlier in this post. |
| Assign access to | Azure AD user, group, or service principal |
|
| Select | The name you entered in the previous step | The default will be your user id. Type in the first couple of characters of the application you added in the previous step |
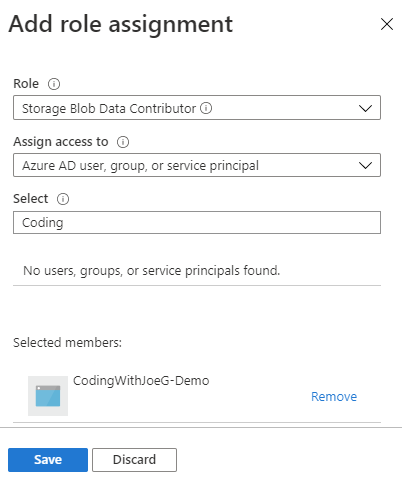
- Click ‘Save’
You can verify the changes by using the ‘Check access’ section of the blade.
You can find more about this approach on Azure Documentation site
Updating the Application Code
The Azure SDK added support for using credentials instead of just the shared storage keys. I added the same support to JosephGuadagno.AzureHelpers.Storage, since underneath the hood it uses the Azure SDK.
Both SDKs take a TokenCredential that can be one of many types. For this post, we are going to allow the SDK to do the work for us by providing the DefaultAzureCredential. The DefaultAzureCredential will look through many ‘different sources’ for credential data, including but not limited to, the Environment, Shared Token Cache, Visual Studio, IntelliJ, and many more. You read more about it in the Azure Identity August 2020 GA Release Notes.
Using the Azure SDK
As of the writing of this post, you would need version 1.2.0 of the Azure SDK
1

Install-Package Azure.Identity -Version 1.2.0
Replace <storage-account> with the name of your Azure Storage account
To connect to a blob client, you would use the following code:
1
2
3

// Create a BlobServiceClient that will authenticate through Active Directory
Uri accountUri = new Uri("https://<storage-account>.blob.core.windows.net/");
BlobServiceClient client = new BlobServiceClient(accountUri, new DefaultAzureCredential());
To create a blob
1
2
3
4
5
6
7
8
9
10

private static async Task<string> CreateBlob()
{
    // Replace the URL below with your storage account URL
    CloudBlockBlob blob =
        new CloudBlockBlob(
            new Uri("https://<storage-account>.blob.core.windows.net/<container>/Blob1.txt"),
            new DefaultAzureCredentials());
    await blob.UploadTextAsync("Blob created by Azure AD authenticated user.");
    return "Blob successfully created";
}
Using JosephGuadagno.AzureHelpers.Storage
As of the writing of this post, you would need version 1.1.0-20200821.1-preview of the library. It’s in preview because I have to finish the docs and tests for the newly added methods.
1

Install-Package JosephGuadagno.AzureHelpers.Storage -Version 1.1.0-20200821.1-preview
Replace storageAccount with the name of your Azure Storage account.
Replace containerName with the name of the Azure Storage container.
To connect to a blob client, you would use the following code:
1

var blobs = new Blobs(storageAccount, null);
To create a blob
1
2

var blobs = new Blobs(storageAccount, null, containerName);
await blobs.UploadAsync("blob1.txt", "path_to_file");
Local Development
Your setup may vary depending on the IDE you are using, Visual Studio, Jetbrains Rider, IntelliJ, Visual Studio Code, etc. I’m going to show you how to set up your Environment variables to use the DefaultAzureCredentials. For this, you will need the Application (Client) ID, Directory (Tenant) ID, and Client Secret (password).
Windows
- Open up your environment variables.
- Enter the following environment variables.
| Name | Corresponding Value | Value |
AZURE_CLIENT_ID |
The Azure application/client id | 6c04f5c5-97f7-486d-bbb2-eeeeeeeeee |
AZURE_CLIENT_SECRET |
The client secret/password | QPxyBvw3.UE8Bw6AJAt63pWx~BB40deded |
AZURE_TENANT_ID |
The directory/tenant id | bee716cf-fa94-4610-b72e-5df4bf5a9999 |
NOTE These are not real values! ![]() These values were taken from the sample JSON response above.
These values were taken from the sample JSON response above.
NOTE Depending on your IDE, Terminal, etc, you may need to restart it after updating these values.
Mac
The procedure may vary depending on your environment/shell. For ZSH/bash, add the following your profile.
1
2
3

export AZURE_CLIENT_ID=6c04f5c5-97f7-486d-bbb2-eeeeeeeeee
export AZURE_CLIENT_SECRET=QPxyBvw3.UE8Bw6AJAt63pWx~BB40deded
export AZURE_TENANT_ID=bee716cf-fa94-4610-b72e-5df4bf5a9999
Azure App Service
To add the access permissions to an Azure Storage Account to an App Service is identical to adding it to our app that we did previously. The only different is we select the name of the app service we want to provide the access to.
Next Steps
Wow, that was a lot. Any questions, please feel free to send me and email or tweet. Like what you see, watch my stream and/or subscribe to my YouTube channel.
Resources
- Microsoft identity platform documentation
- Follow the 425show on Twitch
A recording of me explaining this on my Twitch stream.
Share on
Bluesky Facebook LinkedIn Reddit XLike what you read?
Please consider sponsoring this blog.

