
JetBrains Rider Settings for Presentations
I speak at conferences and user groups and I often use JetBrains Rider for my presentations and demos. While at CodeMash 2026, I noticed a presenter using JetBrains Rider and “missing” some of the features that I like to use when I am presenting. I walked him through some of the settings that I change when I am presenting and thought “I should blog about this.”
Like most blog posts, this is an opinionated list of settings and plugins that I use when presenting with JetBrains Rider. Your mileage may vary and you may find other settings and plugins that work better for you when presenting. The important thing is to find what works best for you when presenting and to have fun presenting with JetBrains Rider.
Plugins
There are many plugins available for JetBrains Rider, these are two that I use when presenting … in no particular order ![]() .
.
Window Arranger
This plugin helps you easily switch between projects, arrange project windows, and resize them to various predefined dimensions. You can align windows horizontally or vertically, maximize, and position them to the left, right, top, or bottom, improving workspace organization and productivity.
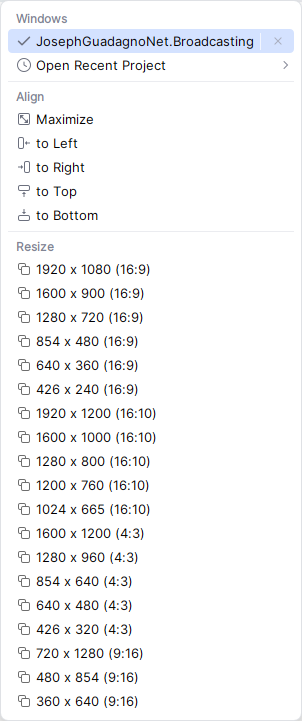
When the plugin is installed and enabled, you will see a “Window” like icon next to the project branch, highlighted in red, like this:
![]()
When you click on the icon, you will see a menu with the different options to arrange the windows.
Key Promoter X
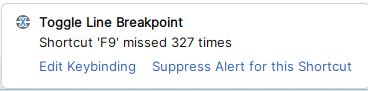
The Key Promoter X helps you to learn essential shortcuts while you are working. When you use the mouse on a button inside the IDE, the Key Promoter X shows you the keyboard shortcut that you should have used instead.
This provides an easy way to learn how to replace tedious mouse work with keyboard keys and helps to transition to a faster, mouse free development. The Key Promoter X tool window shows you a hit-list of the mouse actions you use the most and directly provides you with the shortcut you can use instead. For buttons that don’t have a shortcut, the Key Promoter X prompts you with the possibility to directly create one.
Here is an example of the Key Promoter X showing a keyboard shortcut (F9) for the Toggle Breakpoint action when I click on the red dot in the gutter to set a breakpoint:
Bundled Plugins
This plugins are bundled with JetBrains Rider and I enable them when I am presenting.
Keymaps
I use these mostly because of muscle memory, being a long time user of Visual Studio and ReSharper. Plus, as a bonus, it allows me to show the keyboard shortcuts that most of the attendees of the presentation are used to.
- ReSharper Keymap
- Visual Studio 2022 Keymap
- Visual Studio Keymap
Others
- Terminal: I use the terminal a lot when presenting and this plugin allows me to have a terminal window inside of JetBrains Rider and not have to jump to the operating system terminal.
- Database Tools and SQL: I use this plugin when I am presenting database related topics and it allows me to connect to databases and run SQL queries inside of JetBrains Rider.
Settings
For the settings, I use the default settings for the most part, but there are a few settings that I change when I am presenting. These settings are mostly related to the appearance of the IDE and the editor.
Appearance and Behavior
In the Appearance section, the only “non-default” setting that I change is the Presentation Mode Zoom level, which I set to 175%. This setting is used when you enter presentation mode which I will cover in more detail in the Tool Windows / IDE Features > Appearance section below. This setting allows me to make the text and the UI elements larger when I am presenting, which makes it easier for the attendees to see what I am doing on the screen.
Appearance & Behavior > Presentation Assistant
There used to be a plugin called Presentation Assistant that would show the keyboard shortcuts on the screen when you used them. This plugin is no longer available because it was replaced by built-in features. These settings in the built-in Presentation Assistant help you to make the keyboard shortcuts more visible when presenting.
Navigate to Settings > Appearance & Behavior > Presentation Assistant and review the following settings:
- Check Show action names and shortcuts in popups to show the action names and shortcuts in popups when you use them.
- Assign the Keymaps you would like the Presentation Assistant to show when you use the keyboard shortcuts. I use the Keymaps of ReSharper Keymap and Visual Studio 2022 Keymap when presenting.
My settings look like this:

Editor
Editor > General
I change the following settings in Settings > Editor > General when I am presenting:
Editor > General > Mouse Control
- Check the Change font size with Ctrl+Mouse Wheel in: and select All editors to allow me to quickly adjust the font size if I need to during a presentation.
- Check the More code fragments with drag and drop to allow me to easily move code around when I am presenting.
Editor > General > Soft Wraps
This setting is more of a preference, but I like to check the Soft-wrap these files: and add *.md; *.txt; *.rst; *.adoc to allow me to easily read markdown files and other text files when I am presenting.
Editor > General > Appearance
- Check the Show line numbers: and set it to Absolute so I can reference line numbers when I am presenting and attendees can easily follow along.
Editor > General > Code Folding
These are more of a preference, and depending on the type of presentation I am giving, I may check or uncheck these settings. My default settings are:
Show code folding arrows is checked and set to On mouse hover.
Fold by default is checked for the following:
- General > File header
- General > Imports
- Android > String references
- JSON > Show key count in folded JSON
- Markdown > Collapse front matter
- Markdown > Collapse links
- Markdown > Collapse table of contents
- XML > HTML ‘style’ attribute
- XML > XML Entities
- XML > Data URIs
- YAML > Limit folded keys and values to
20characters - .NET > Preprocessor regions
- C/C++ > Conditionally non-compiled code
- F# > F# hash directives blocks
Editor > Font
Now this setting has a lot of personal preferences, but the two settings that I use when presenting are:
- Font: I also use a Mono spaced font when presenting and coding so I really don’t have to change this setting when I am presenting. I use JetBrainsMono Nerd Font Mono, but you can use any Mono spaced font that you like.
- Font size is usually set to
13and line height is set to1.0when I am presenting. However, this will be adjusted based on the size of the room and the size of the screen that I am presenting on. I usually start with these settings and then adjust them as needed during the presentation. I’ll cover this is more detail in the Important Keyboard Shortcuts and Tool Windows / IDE Features section below.
Tool Windows / IDE Features
Tool Windows
These are available via shortcuts and via the View > Tool Windows menu. I use these tool windows when I am presenting to show different aspects of the IDE and to help me navigate through the code and the project. Some of the tool windows I use when presenting are:
- Explorer:
CTRL+ALT+Lor View > Tool Windows > Explorer to show the project structure and files when I am presenting. - Database:
CTRL+\+Sor View > Tool Windows > Database to show the database connections and queries when I am presenting. - TODO:
CTRL+\+Tor View > Tool Windows > TODO to show the TODO items in the code when I am presenting.
Appearance
These are available via shortcuts and via the View > Appearance menu. I use these appearance features when I am presenting to show reduce distractions and to help me navigate through the code and the project.
Some of the appearance features I use when presenting are:
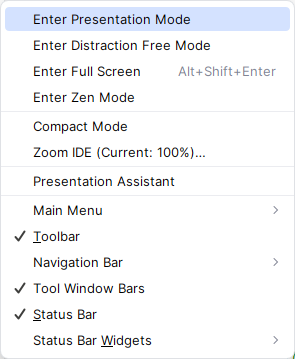
Appearance > Presentation Mode
When I am ready to start presenting, I enter the presentation mode by going to View > Appearance > Enter Presentation Mode. This will hide all the tool windows and the menu bar and will make the editor take up the entire screen. This is a great way to focus on the code and the presentation without any distractions.
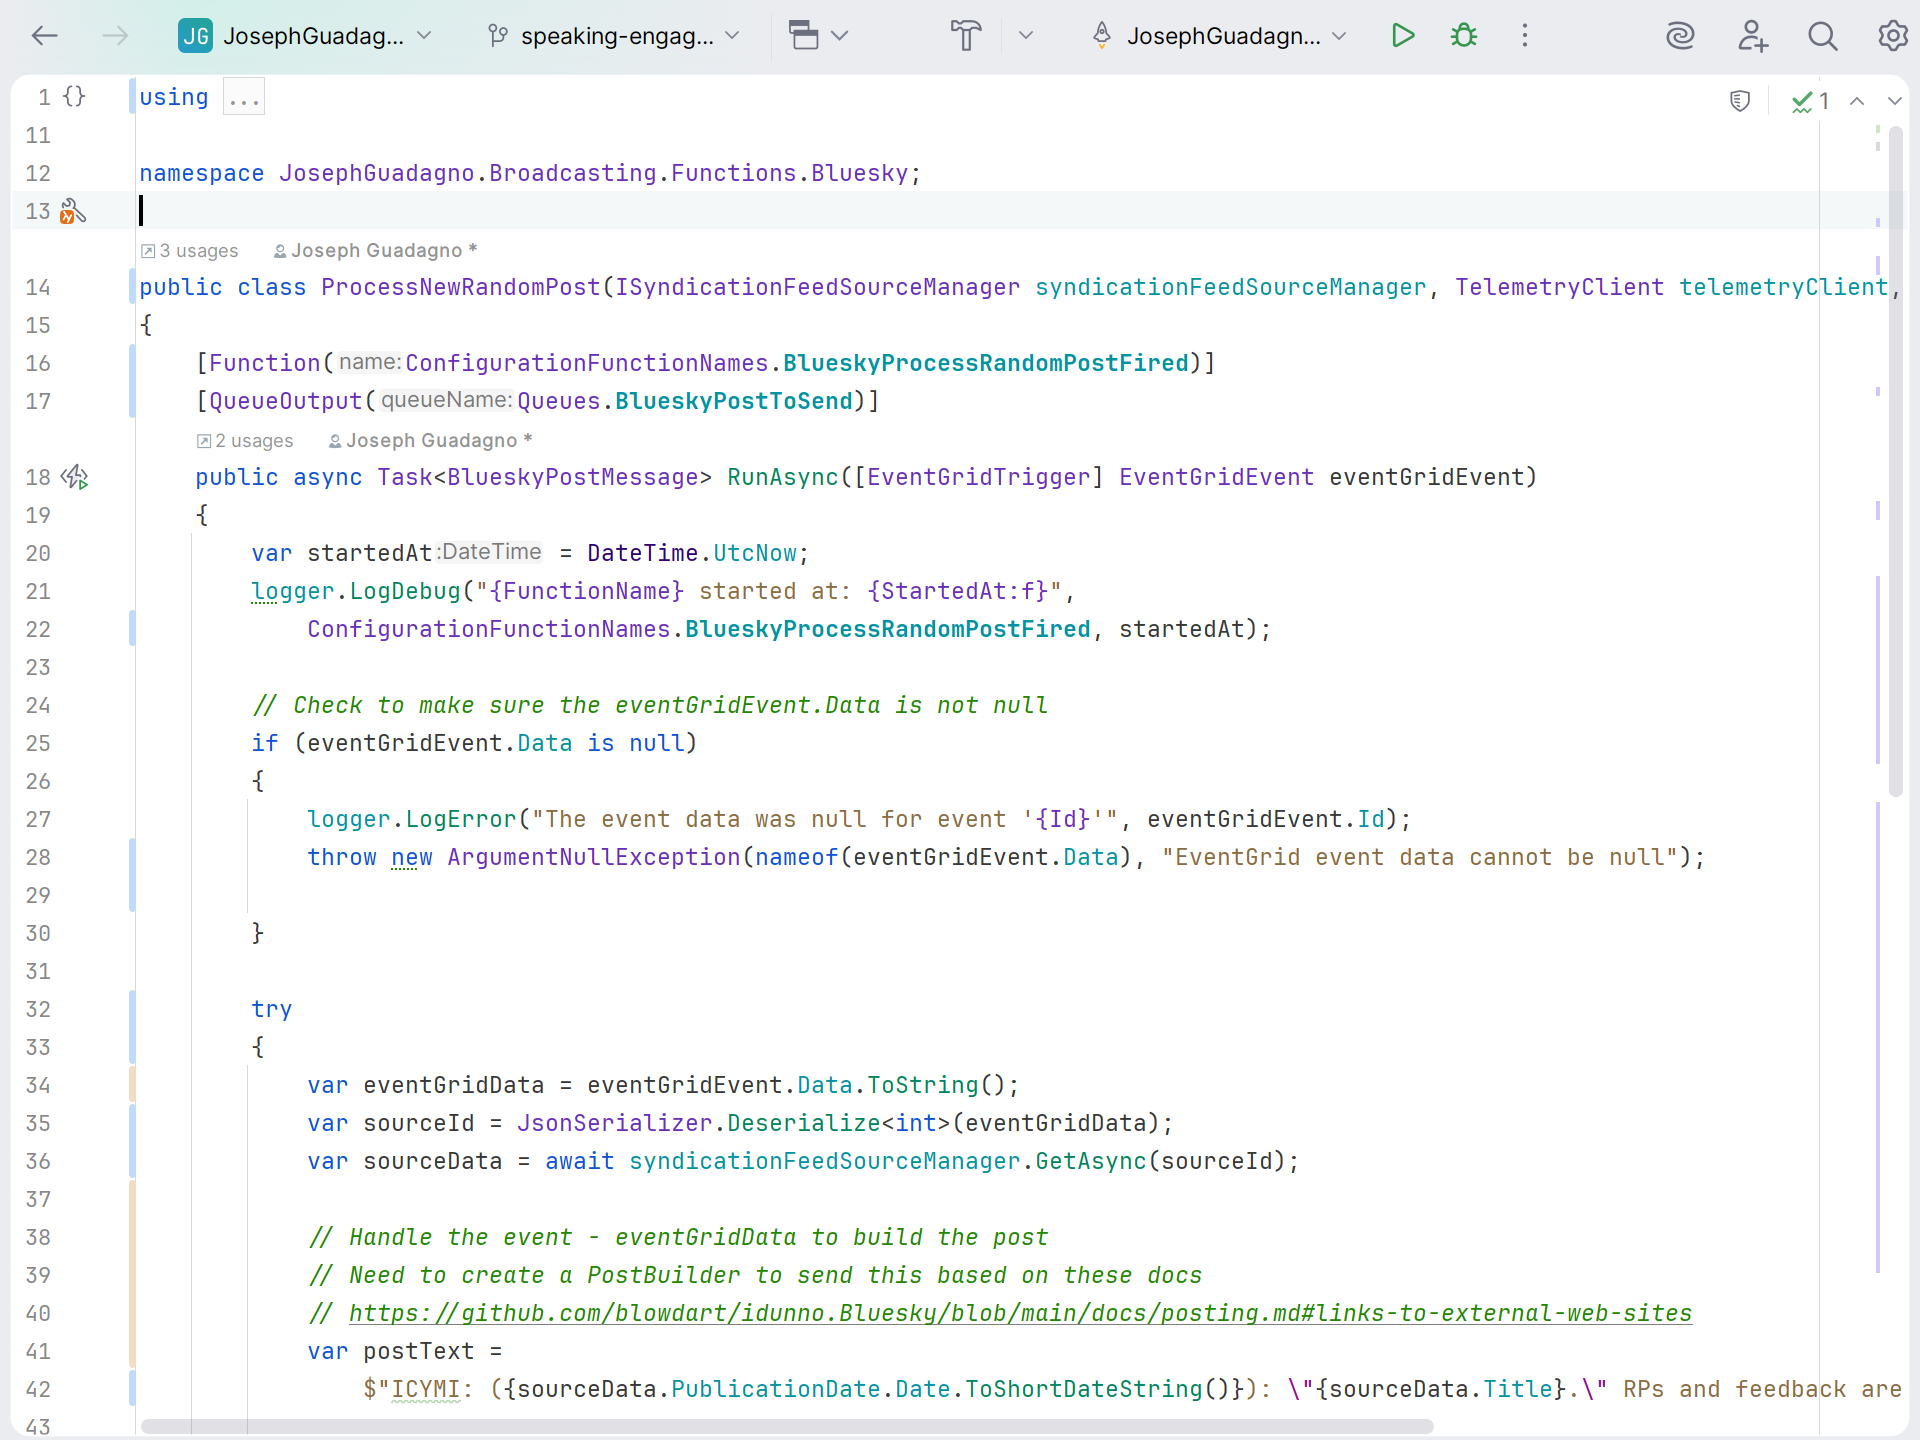
It’s going to be a little hard to see in the screenshot, but when you enter presentation mode, the menu bar and the tool windows are hidden and the editor takes up the entire screen. This screenshot is at a 1920x1440 resolution, so you can see that the editor is taking up the entire screen with just the code window, and there are no distractions.
While in presentation mode, you can still access the tool windows and the menu bar by using the shortcuts or by moving your mouse to the top of the screen to show the menu bar and the tool windows. This allows you to quickly access the features of the IDE without having to exit presentation mode.
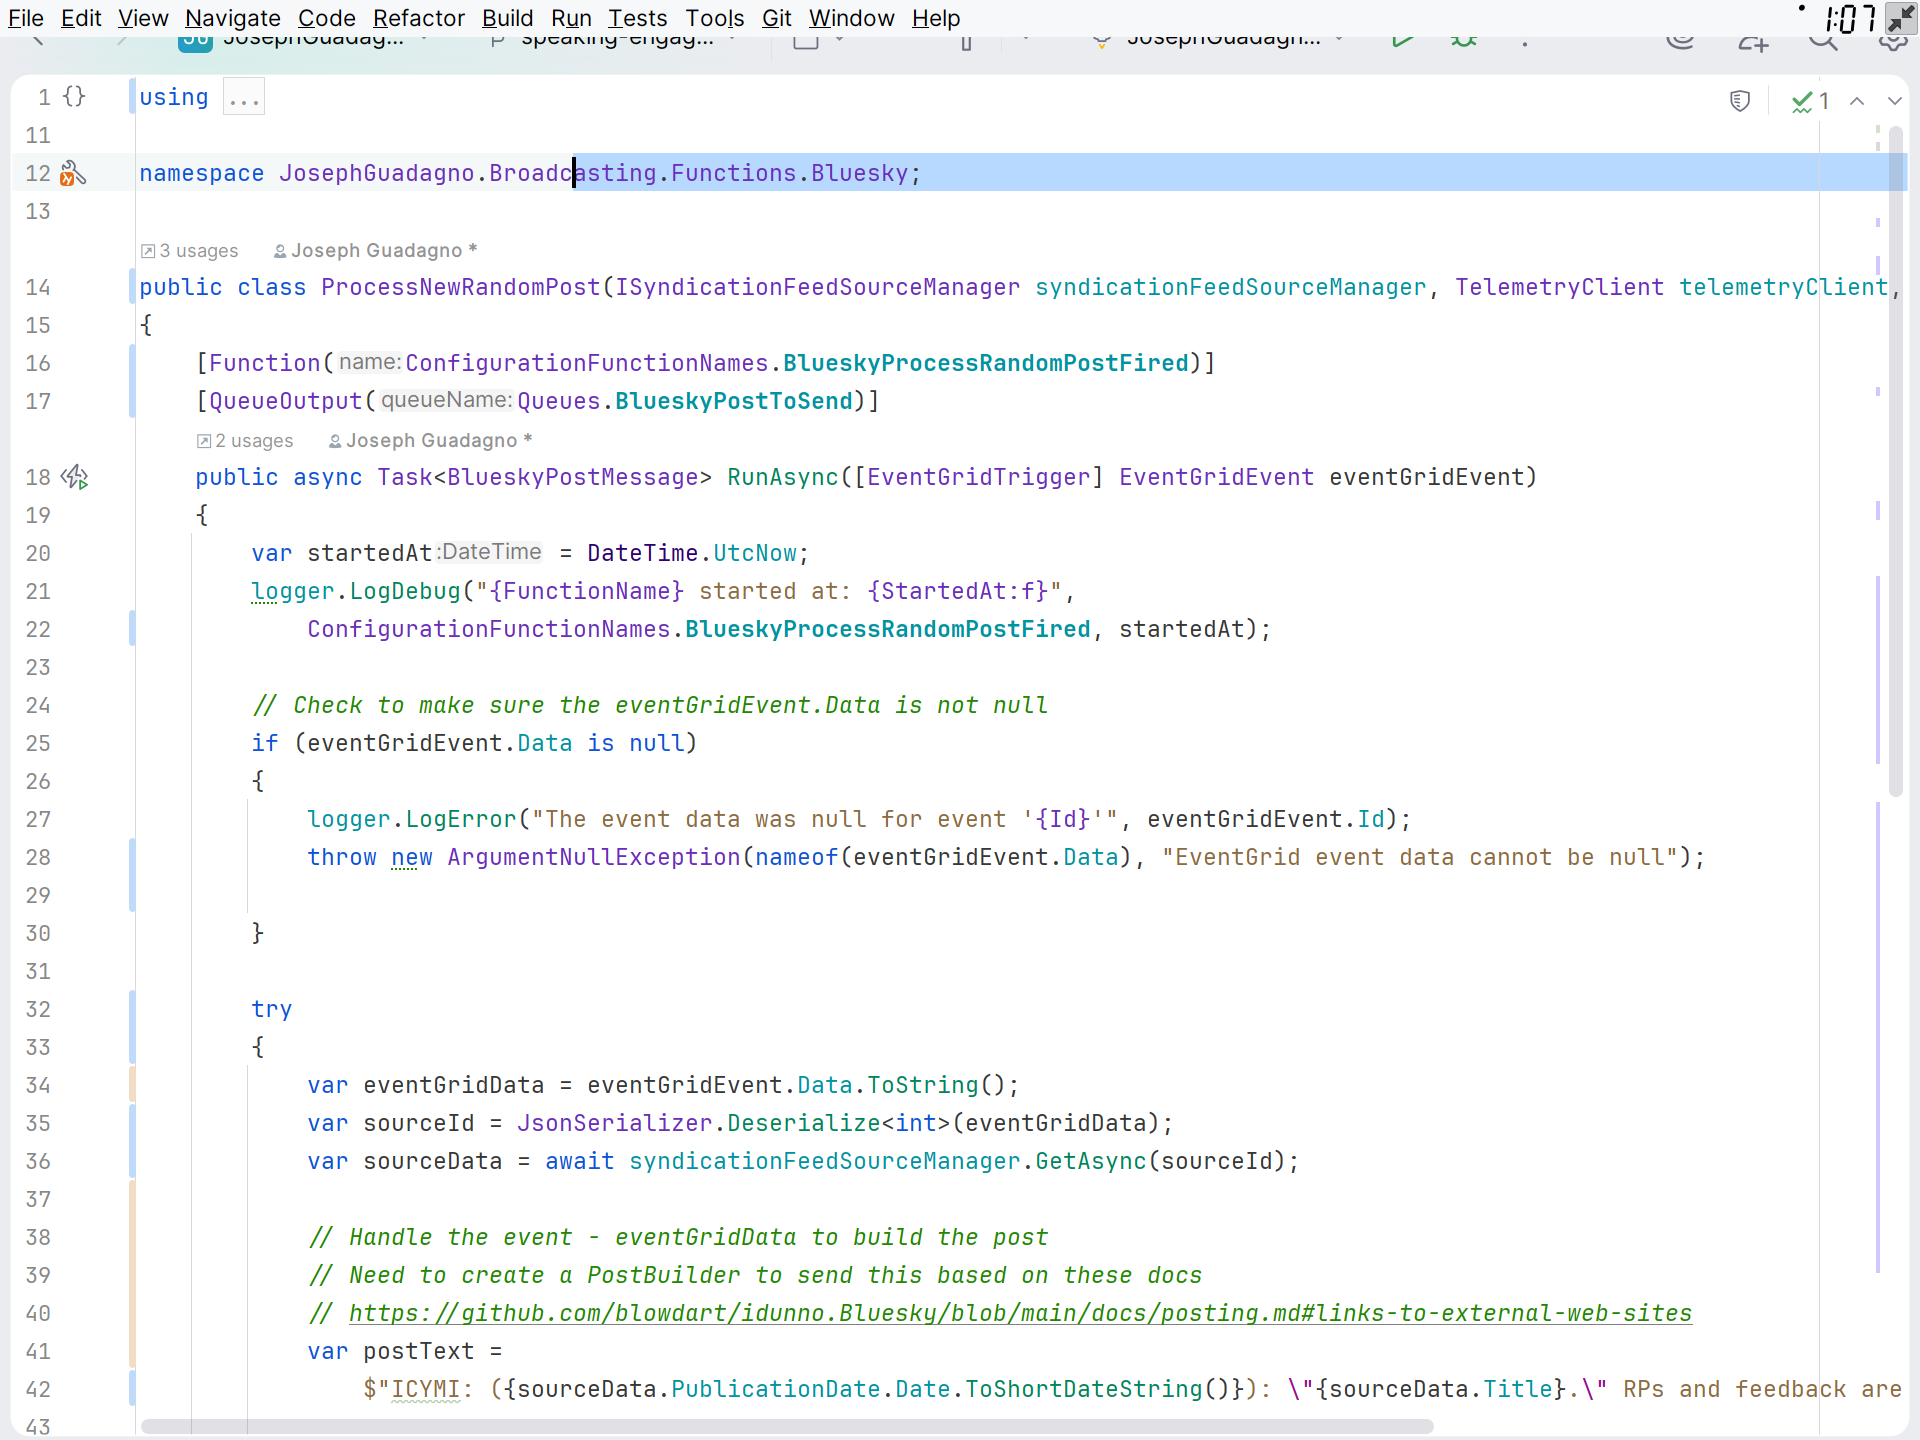
You’ll also notice, that in the upper right corner of menu bar, there is a clock with the current time. This is a great way to keep track of time during a presentation and to make sure that you are staying on schedule. Plus, there is a Presentation Mode indicator next to the clock, so you can easily exit presentation mode.
Appearance > Presentation Assistant
Choose the Presentation Assistant option from the View > Appearance menu to show the keyboard shortcuts on the screen when you use them. This is a great way to show the attendees what keyboard shortcuts you are using during a presentation and to help them learn the shortcuts as well.
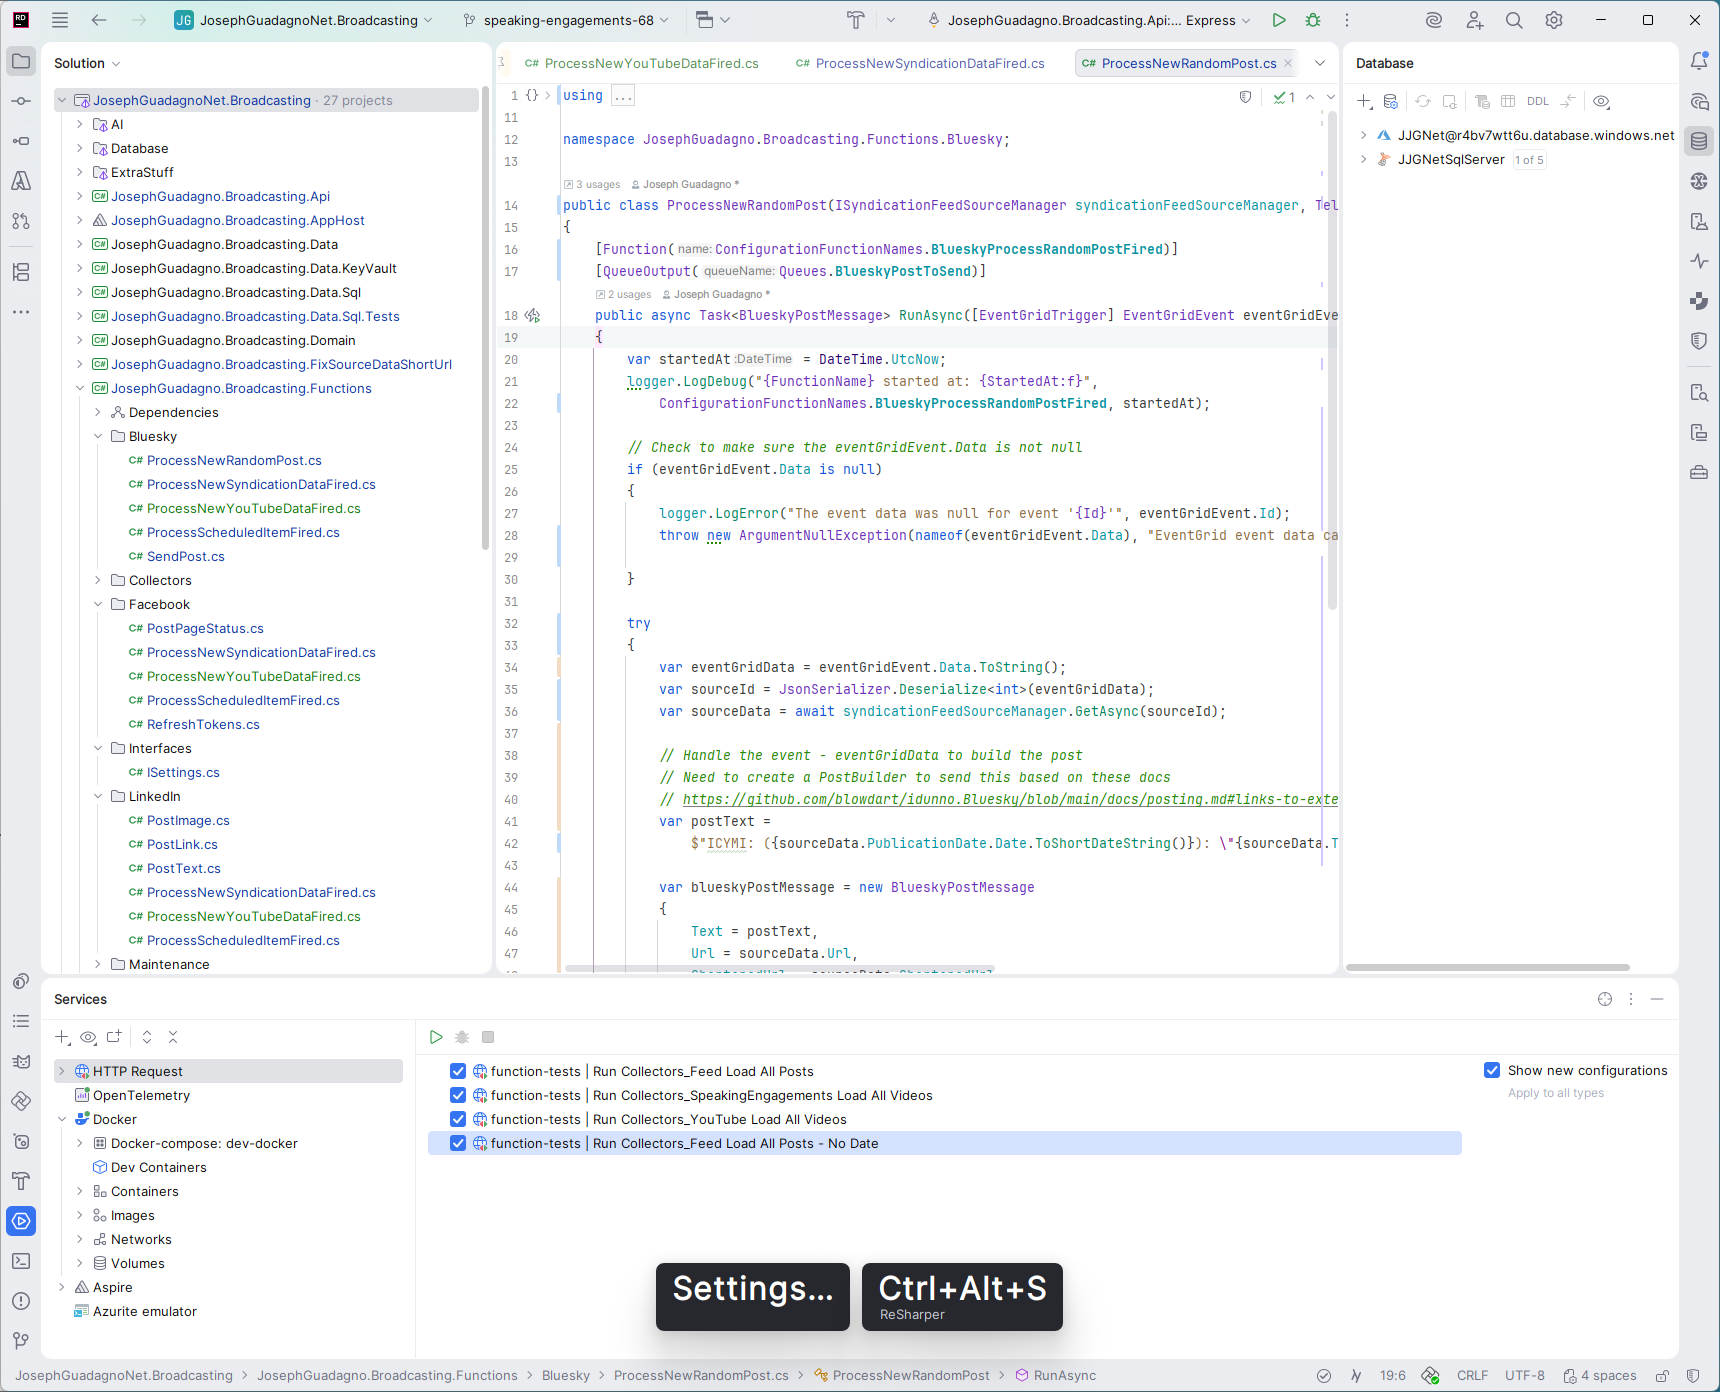
You can see in the screenshot above that I pressed CTRL+ALT+S to open the settings and the Presentation Assistant is showing the keyboard shortcut on the screen. This is a great way to show the attendees what keyboard shortcuts you are using during a presentation and to help them learn the shortcuts as well. Especially, if you forget to mention the keyboard shortcut that you are using during a presentation.
Important Keyboard Shortcuts
You can find all the keyboard shortcuts in the Settings > Keymap section, but here are some of the important keyboard shortcuts that I use when presenting, besides the typical CUT, COPY, PASTE shortcuts.
These shortcuts are with the Visual Studio 2022 Keymap, but you can use the shortcuts from the Keymap that you are using when presenting.
General
| Action | Shortcut | Description |
| Build Solution | CTRL+SHIFT+B |
Build the entire solution. |
| Increase Font Size | CTRL+Mouse Wheel Up |
Increase the font size. |
| Increase Font Size in All Editors | CTRL+SHIFT+. |
Increase the font size in all editors. |
| Decrease Font Size in All Editors | CTRL+SHIFT+, |
Decrease the font size in all editors. |
| Code Completion | CTRL+SPACE |
Show code completion suggestions. |
Navigation
| Action | Shortcut | Description |
| Go to File | CTRL+SHIFT+T |
Go to a file in the project. |
| Search Everywhere |
CTRL+T or CTRL+,
|
Search for anything in the IDE. |
| Go to Line | CTRL+G |
Go to a specific line in the editor. |
Wrap Up
As I mentioned at the beginning of this post, these are just some of the settings and plugins that I use when presenting with JetBrains Rider. There are many other settings and plugins that you can use when presenting with JetBrains Rider, so I encourage you to explore the settings and plugins and find what works best for you when presenting.
References
Share on
Bluesky Facebook LinkedIn Reddit XLike what you read?
Please consider sponsoring this blog.

