
Setup Code Signing Certificates in Azure Key Vault
Let’s take a look at how you can set up and configure Azure Key Vault to store Code Signing Certificates
In this post, we’ll take a look at how to store Code Signing Certificates in an Azure Key Vault. In a future post we’ll use this certificate to sign a NuGet package to ultimately deploy to Azure Artifacts.
Code Signing Certificate
What is a code signing certificate you ask? I’m glad you asked! According to DigiCert code signing certificates are used by software developers to digitally sign apps, drivers, and software programs as a way for end-users to verify that the code they receive has not been altered or compromised by a third party. They include your signature, your company’s name, and if desired, a timestamp.
Essentially, they are a way to validate that source code, packages, executables, etc., comes from who it says it’s from, similarly to how certificates on a web site authenticate the web site when you go to HTTPS enabled web site.
You can purchase a code signing certificate from a few different sources like DigiCert, who I have my code certificate from. I am not going to cover how to purchase one. If you do not have one, you can purchase one with DigiCert, GoDaddy, or several other companies. Please note, they can be expensive for an individual.
Azure Key Vault
Azure Key Vault helps solve the following problems:
- Secrets Management - Azure Key Vault can be used to Securely store and tightly control access to tokens, passwords, certificates, API keys, and other secrets
- Key Management - Azure Key Vault can also be used as a Key Management solution. Azure Key Vault makes it easy to create and control the encryption keys used to encrypt your data.
- Certificate Management - Azure Key Vault is also a service that lets you easily provision, manage, and deploy public and private Transport Layer Security/Secure Sockets Layer (TLS/SSL) certificates for use with Azure and your internal connected resources.
- Store secrets backed by Hardware Security Modules - The secrets and keys can be protected either by software or FIPS 140-2 Level 2 validated HSMs
Like most services on Azure, there is a cost. Check out the pricing for Azure Key Vault.
Getting Started
We’ll start by creating an Azure Key Vault.
- Sign in to the Azure Portal
- Click ‘Create Resource’
- In the ‘Search the Marketplace’ text box, type
Key Vaultand hit ‘Enter’ - Click ‘Create’

Key Vault Creation
You’ll be presented with the ‘Create key vault’ wizard. For the most part, you can leave all of the defaults.
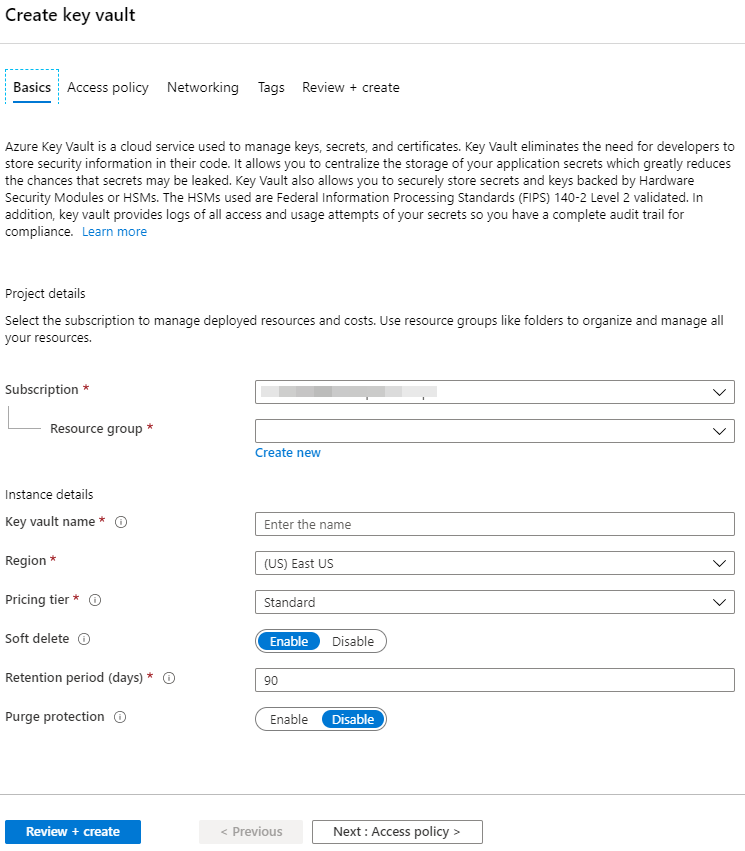
If you want to follow along, here are the settings I used.
| Setting | Value | Comments |
|---|---|---|
| Subscription | my subscription | |
| Resource Group | Presentations |
I put all of my presentation and blog resources in this one group |
| Key Vault Name | Code-Signing-Demo-Vault |
Note: This must be unique |
| Region | (US) West US 2 |
You should choose a region close to your resources |
| Pricing tier | Standard | Where’s the free option |
The rest are defaults.
Click ‘Review + Create’
If you did everything correctly, you will get a Validation passed. Validation feels good, doesn’t it!
Click ‘Create’
After a few moments, the vault will be created and you will have a page similar to this. I blurred out the secret stuff.

Click on ‘Go to resource’
Upload Certificate
There are a few ways to get a certificate into Azure Key Vault as outlined by the page Certificate creation methods. The easiest would probably be the ‘Partnered CA Providers’ method. But who likes easy?
I chose to import my certificate into Azure Key Vault. This requires importing the certificate into the certificate store on my local computer first, then exporting the certificate to upload/import it into the Azure Key Vault. Since I purchased my certificate from DigiCert, I could use their DigiCert Certificate Utility. The steps below assume that you have a ‘pfx’ file with your private secret, aka password for the certificate.
Back to the Azure Key Vault page do the following:
- Click on the ‘Certificates’ item in the Settings section of the table of contents
- Click on ‘+ Generate/Import’
- Under ‘Method of Certificate Creation’, chose
Import - Give the certificate a name. For me, I used the name of the certificate with the year it expires. Example:
JosephGuadagno-2020 - Select the certificate file. Note: Key Vault requires that the certificate be in the pfx or pem format
- Use the ‘private key’ that you used when you exported your key.
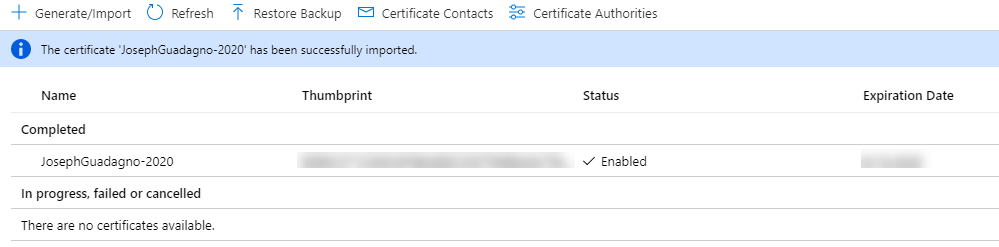
- Click ‘Create’
If everything was successful, you will see a page like this.
Conclusion
Now that the certificate is in the vault we have to give an application or user access to it. We’ll do that in a future post.
Share on
Bluesky Facebook LinkedIn Reddit XLike what you read?
Please consider sponsoring this blog.

