
Using Certificates for Authentication with Microsoft Identity Library
A few weeks ago, I was on AspiriFridays where Damian Edward, David Fowler, Maddy Montaquila and I were adding Aspire to the JosephGuadagno.NET Broadcasting application. At one point during the conversation, I brought up that I might need to renew the client id and secret’s for the application. Damian mentioned that Microsoft mandated using certificates for inter-application authentication. I explained that I tried it once before but I couldn’t get it to work. Well this weekend I decided to give it another try and I was able to get it working. In this article, I’m going to show you how to use certificates for authentication with the Microsoft Identity Library in .NET applications.
For the application, I used the Microsoft Identity Platform and the Microsoft Authentication Library (MSAL). The application is built using ASP.NET Core, Azure, Swagger, and other components. The web application requires user authentication via Entra, and the API is secured using the Microsoft Identity Platform. If you want more information on how to secure an API using the Microsoft Identity Platform, check out my previous series called Protecting an ASP.NET Core API with Microsoft Identity Platform.
Now the documentation for using certificates with the Microsoft Identity Platform is a bit sparse, so I had to piece together the information from various sources. In this article, I’m going to show you how to use certificates for authentication with the Microsoft Identity Library in .NET applications.
Certificate Generation
There are two ways to generate certificates for use with the Microsoft Identity Platform. You can generate a certificate locally or you can use a third-party service to generate the certificate. In this article, I’m going to show you both methods. The local method is useful for development and testing purposes, while the third-party method is more suitable for production environments.
Local Certificate Generation
If you don’t have access to the production certificate, which most won’t, and you do not want to purchase a certificate yourself, you can generate a self-signed certificate. It’s a couple of PowerShell commands to create a self-signed certificate to use for development and testing purposes. Open a PowerShell window and run the following commands:
1
New-SelfSignedCertificate -KeyFriendlyName "JosephGuadagno-Broadcasting" -DnsName "josephguadagno-broadcasting.net" -CertStoreLocation "Cert:\CurrentUser\My"
Replace the -DnsName parameter with the domain name you want to use for the certificate, and the -KeyFriendlyName parameter with a friendly name for the certificate. This command will create a self-signed certificate and store it in the current user’s personal certificate store.
This will generate a local certificate. This certificate needs to be exported and registered in the application registration for which you want to use it in the Azure portal. To export the certificate, in Windows, open the certmgr.msc application, or Manage User Certificates.
- Locate the certificate in the
Personal\Certificatesfolder - Open the certificate
- Click Details
- Click Copy to File…
- Click Next
- Select No
- Select DER encoded binary
- Click Next
- Select a file name and location
- Click Next
- Click Finish
You should see a message that the export was successful. Click OK to close the message. You now have a certificate that you can use for development and testing purposes.
Configure the Application to Use the Certificate
Now that you have the certificate registered in Azure, you need to configure your application to use the certificate for authentication. This is done by adding some configuration settings to the appsettings.json file in your application. Assuming that you already have the Microsoft Identity Platform configured in your application, you need to add the ClientCertificates section to the configuration settings in the appsettings.json file:
1
2
3
4
5
6
7
8
9
10
11
12
13
14
15
{
  "AzureAd": {
    "Instance": "https://login.microsoftonline.com/",
    "Domain": "yourdomain.onmicrosoft.com",
    "TenantId": "your-tenant-id",
    "ClientId": "your-client-id",
    "ClientCertificates": [
      {
        "SourceType": "StoreWithDistinguishedName",
        "CertificateStorePath": "CurrentUser/My",
        "CertificateDistinguishedName": ""
      }
    ]
  }
}
For the CertificateDistinguishedName settings, enter the distinguished name field of the self-signed certificate you created earlier prepended with the CN=. The CN= is a search by common name. The -DnsName parameter contains the common name you used. In the sample above, it was josephguadagno-broadcasting.net. So the CertificateDistinguishedName would be CN=josephguadagno-broadcasting.net.
Register the Certificate in Azure
Once you have the certificate exported, you need to register it in the Azure portal. This is done by uploading the certificate to the application registration in Application Registrations in the Azure portal.
Navigate to the Azure portal and the application registration for your application. In the left-hand menu…
- Click on Manage
- Click on Certificates & secrets
- Click on the Certificates tab
- Click on the Upload certificate button
- In the blade that appears, in the Select a file input field, click on the folder button
- Select the certificate file you exported earlier and click Add. The certificate will now be registered in the application registration.
- End a description for the certificate in the Description input field. Note: You will need this description later when you configure the application to use the certificate.
- Click Add to add the certificate to the application registration.
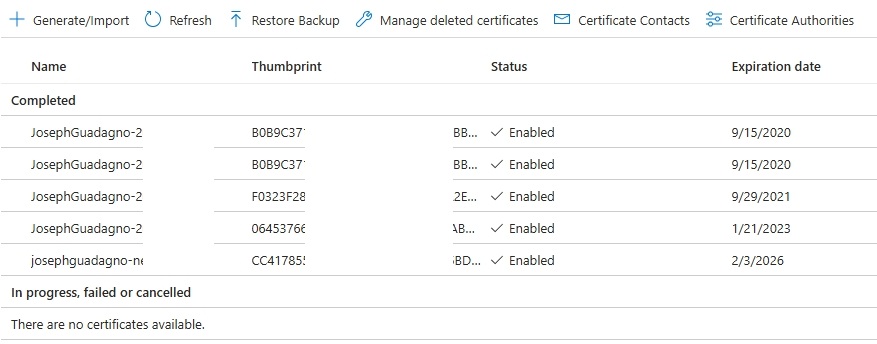
Once done, you should see the certificate listed in the Certificates tab.

You can now use this certificate to authenticate your application with the Microsoft Identity Platform.
Third-Party Certificate Generation
If you want to use a third-party service to generate the certificate, you can use a service like Let’s Encrypt or DigiCert. These services will generate a certificate for you and provide you with the necessary files to use in your application. The process for generating the certificate will vary depending on the service you choose, so refer to the documentation for the service you choose.
I’m going to assume that you have a certificate generated by a third-party service and you have the necessary files to use in your application. The process for using the certificate in your application is similar to the process for using a self-signed certificate except you will need to generate a .pfx file from the certificate files provided by the service and then upload the .pfx file to the application registration in the Azure portal.
Let’s say you have a certificate file name josephguadagno_net.crt and a private key file name josephguadagno_net.key. You can generate a .pfx file using the following command:
1
openssl pkcs12 -export -out josephguadagno_net.pfx -inkey josephguadagno_net.key -in josephguadagno_net.crt
This command will generate a .pfx file named josephguadagno_net.pfx that you can use in your application. You will be prompted to enter a password for the .pfx file. Make sure to remember this password as you will need it later when you configure the application to use the certificate. Your inkey may also be a .pem file, so you can use the same command with the .pem file instead of the .key file.
Upload the Certificate to Azure
Now that you have the .pfx file, you need to upload it to the application registration and Azure Key Vault in the Azure portal.
Upload the Certificate to Azure Key Vault
First step is to upload the certificate to the Azure Key Vault. Choose the Key Vault you want to use and follow these steps:
- In the left-hand menu, click on Objects
- Click on Certificates
- Click on the Generate/Import button
- Change the Method of Certificate Creation to Import
- Enter a name for the certificate in the Certificate Name input field. Note: You will need this name later when you configure the application to use the certificate.
- For the Upload certificate file input field, click on the folder button
- Select the
.pfxfile you generated earlier and click Add. The certificate will now be uploaded to the Key Vault.
- Select the
- Enter the password for the
.pfxfile in the Password input field. This is the password you entered when you generated the.pfxfile. - Click Create to create the certificate in the Key Vault.
Once done, you should see the certificate listed in the Certificates tab.
Upload the Certificate to the Application Registration
Next, you need to upload the certificate to the application registration in the Azure portal. Navigate to the Azure portal and the application registration for your application. In the left-hand menu click on Manage and then click on Certificates & secrets. Now this is the same process as uploading a self-signed certificate except we will need to upload the .crt file that was used to generate the .pfx file.
- In the blade that appears, in the Select a file input field, click on the folder button
- Select the certificate file you exported earlier and click Add. The certificate will now be registered in the application registration.
- End a description for the certificate in the Description input field. Note: You will need this description later when you configure the application to use the certificate.
- Click Add to add the certificate to the application registration.
Now you should see the certificate listed in the Certificates tab.
Configure Azure to Use the Certificate
Now that you have uploaded the certificate to both the Azure Key Vault and the application registration, you need to configure your application to use the certificate for authentication. This typically involves updating your application’s configuration to include the certificate information.
Assuming that you already have the Microsoft Identity Platform configured in your application and are using an Azure Web App, you need to add the following configuration settings to the appsettings.json file in your application:
1
2
3
4
5
6
7
8
9
10
11
12
13
14
15
{
  "AzureAd": {
    "Instance": "https://login.microsoftonline.com/",
    "Domain": "yourdomain.onmicrosoft.com",
    "TenantId": "your-tenant-id",
    "ClientId": "your-client-id",
    "ClientCertificates": [
      {
        "SourceType": "KeyVault",
        "KeyVaultUrl": "your-key-vault-name",
        "KeyVaultCertificateName": "your-certificate-name"
      }
    ]
  }
}
or in the Environment Variables for the Azure Web App:
1
2
3
4
5
6
7
8
9
10
11
12
13
14
15
  {
    "name": "AzureAd__ClientCertificates__0__KeyVaultCertificateName",
    "value": "CertificateName",
    "slotSetting": false
  },
  {
    "name": "AzureAd__ClientCertificates__0__KeyVaultUrl",
    "value": "https://<your_vault>.vault.azure.net/",
    "slotSetting": false
  },
  {
    "name": "AzureAd__ClientCertificates__0__SourceType",
    "value": "KeyVault",
    "slotSetting": false
  },
Replace the KeyVaultName and CertificateName parameters with the name of the Key Vault and the name of the certificate you uploaded earlier. The SourceType is set to KeyVault to indicate that the certificate is stored in Azure Key Vault.
Wrap Up
Using certificates for authentication with the Microsoft Identity Library in .NET applications is a secure way to authenticate your application with the Microsoft Identity Platform. In this article, I showed you how to generate a self-signed certificate for development and testing purposes, use existing certificates, how to upload the certificate to Azure Key Vault and the application registration, and how to configure your application to use the certificate for authentication.
I hope that this article has been helpful in getting you started with using certificates for authentication with the Microsoft Identity Library in .NET applications and that Microsoft will continue to improve the documentation for using certificates with the Microsoft Identity Platform. If you have any questions or comments, feel free to reach out to me though any of the social media links to the left.
References
Share on
Bluesky Facebook LinkedIn Reddit XLike what you read?
Please consider sponsoring this blog.

