
Working with Microsoft Identity - Registering an Application
Securing our applications and data is critical in this day and age. I’ve been working a lot with the new Microsoft identity platform (MSAL) library, so I decided to create a series of blog posts around working with it.
- Register an application (this post)
- Configure Local Development
- Assigning a Role
I’ve been following the pattern of creating a dedicated test application to validate that everything works locally. By Application, I don’t mean an executable or javascript application, I mean registering an application with the Microsoft Identity Platform.
There are two ways in which you to do this, the Azure Command Line Interface (CLI) or the Azure Portal. I’ll demonstrate both.
Azure CLI
If you don’t have the CLI installed and prefer the command-line, check out the installation instructions.
To register your application with Azure using the Azure CLI, open up Terminal, Bash, Command Prompt, ITerm, or whatever your preferred command prompt is.
First, you need to log in with the command line.
1
az login
Once logged in, the next step would be to create the Azure Active Directory service principal. Creating the service principal registers the application. You can use the ad sp command, which stands for ‘Active Directory’ ‘Service Principal’. We are going to use create-for-rbac sub-command. Documentation
The command looks similar to this.
1
2
3
4
az ad sp create-for-rbac `
  --name "<name>" `
  --role "<role>" `
  --scopes /subscriptions/<scope-subscription>/resourceGroups/<scope-resource-group>/providers/Microsoft.Storage/storageAccounts/<scope-resource-storage>
NOTE This should be entered in one line, or use the backtick
Replace the following ‘tokens’ with your actual values
| Name | Description |
name |
The name for the application |
role |
The Azure Active Directory role you want to assign to this application |
scope-subscription |
The subscription id of you Azure subscription |
scope-resource-group |
The resource group that the storage container belongs to |
scope-resource-storage |
The Azure Storage container you want to grant access to |
Since the name and role can contain spaces, you should wrap them in double quotes (“).
Assuming you have the authorization and syntax-correct, the call will return a JSON file that looks like this:
1
2
3
4
5
6
7
{
  "appId": "6c04f5c5-97f7-486d-bbb2-eeeeeeeeee",
  "displayName": "My Test Application - Local Development",
  "name": "https://MyTestApplication.LocalDevelopment",
  "password": "QPxyBvw3.UE8Bw6AJAt63pWx~BB40deded",
  "tenant": "bee716cf-fa94-4610-b72e-5df4bf5a9999"
}
Note I’ve changed the values here from the values I received.
At this point, you’ll want to save values of the appId, password, and tenant. Once you close your terminal you will now be able to retrieve the password again.
You can find more about this approach on Azure Documentation site
Azure Portal
If you are like me, you like to do most of the work in the portal, although I find myself using the command line more. Let’s take a look registering your application with the portal.
Register the Application
Start with signing into the portal and navigate to your Azure Active Directory. Look for the ‘App Registrations’ blade in the menu on the left and click on it.
Click on ‘+ New registration’
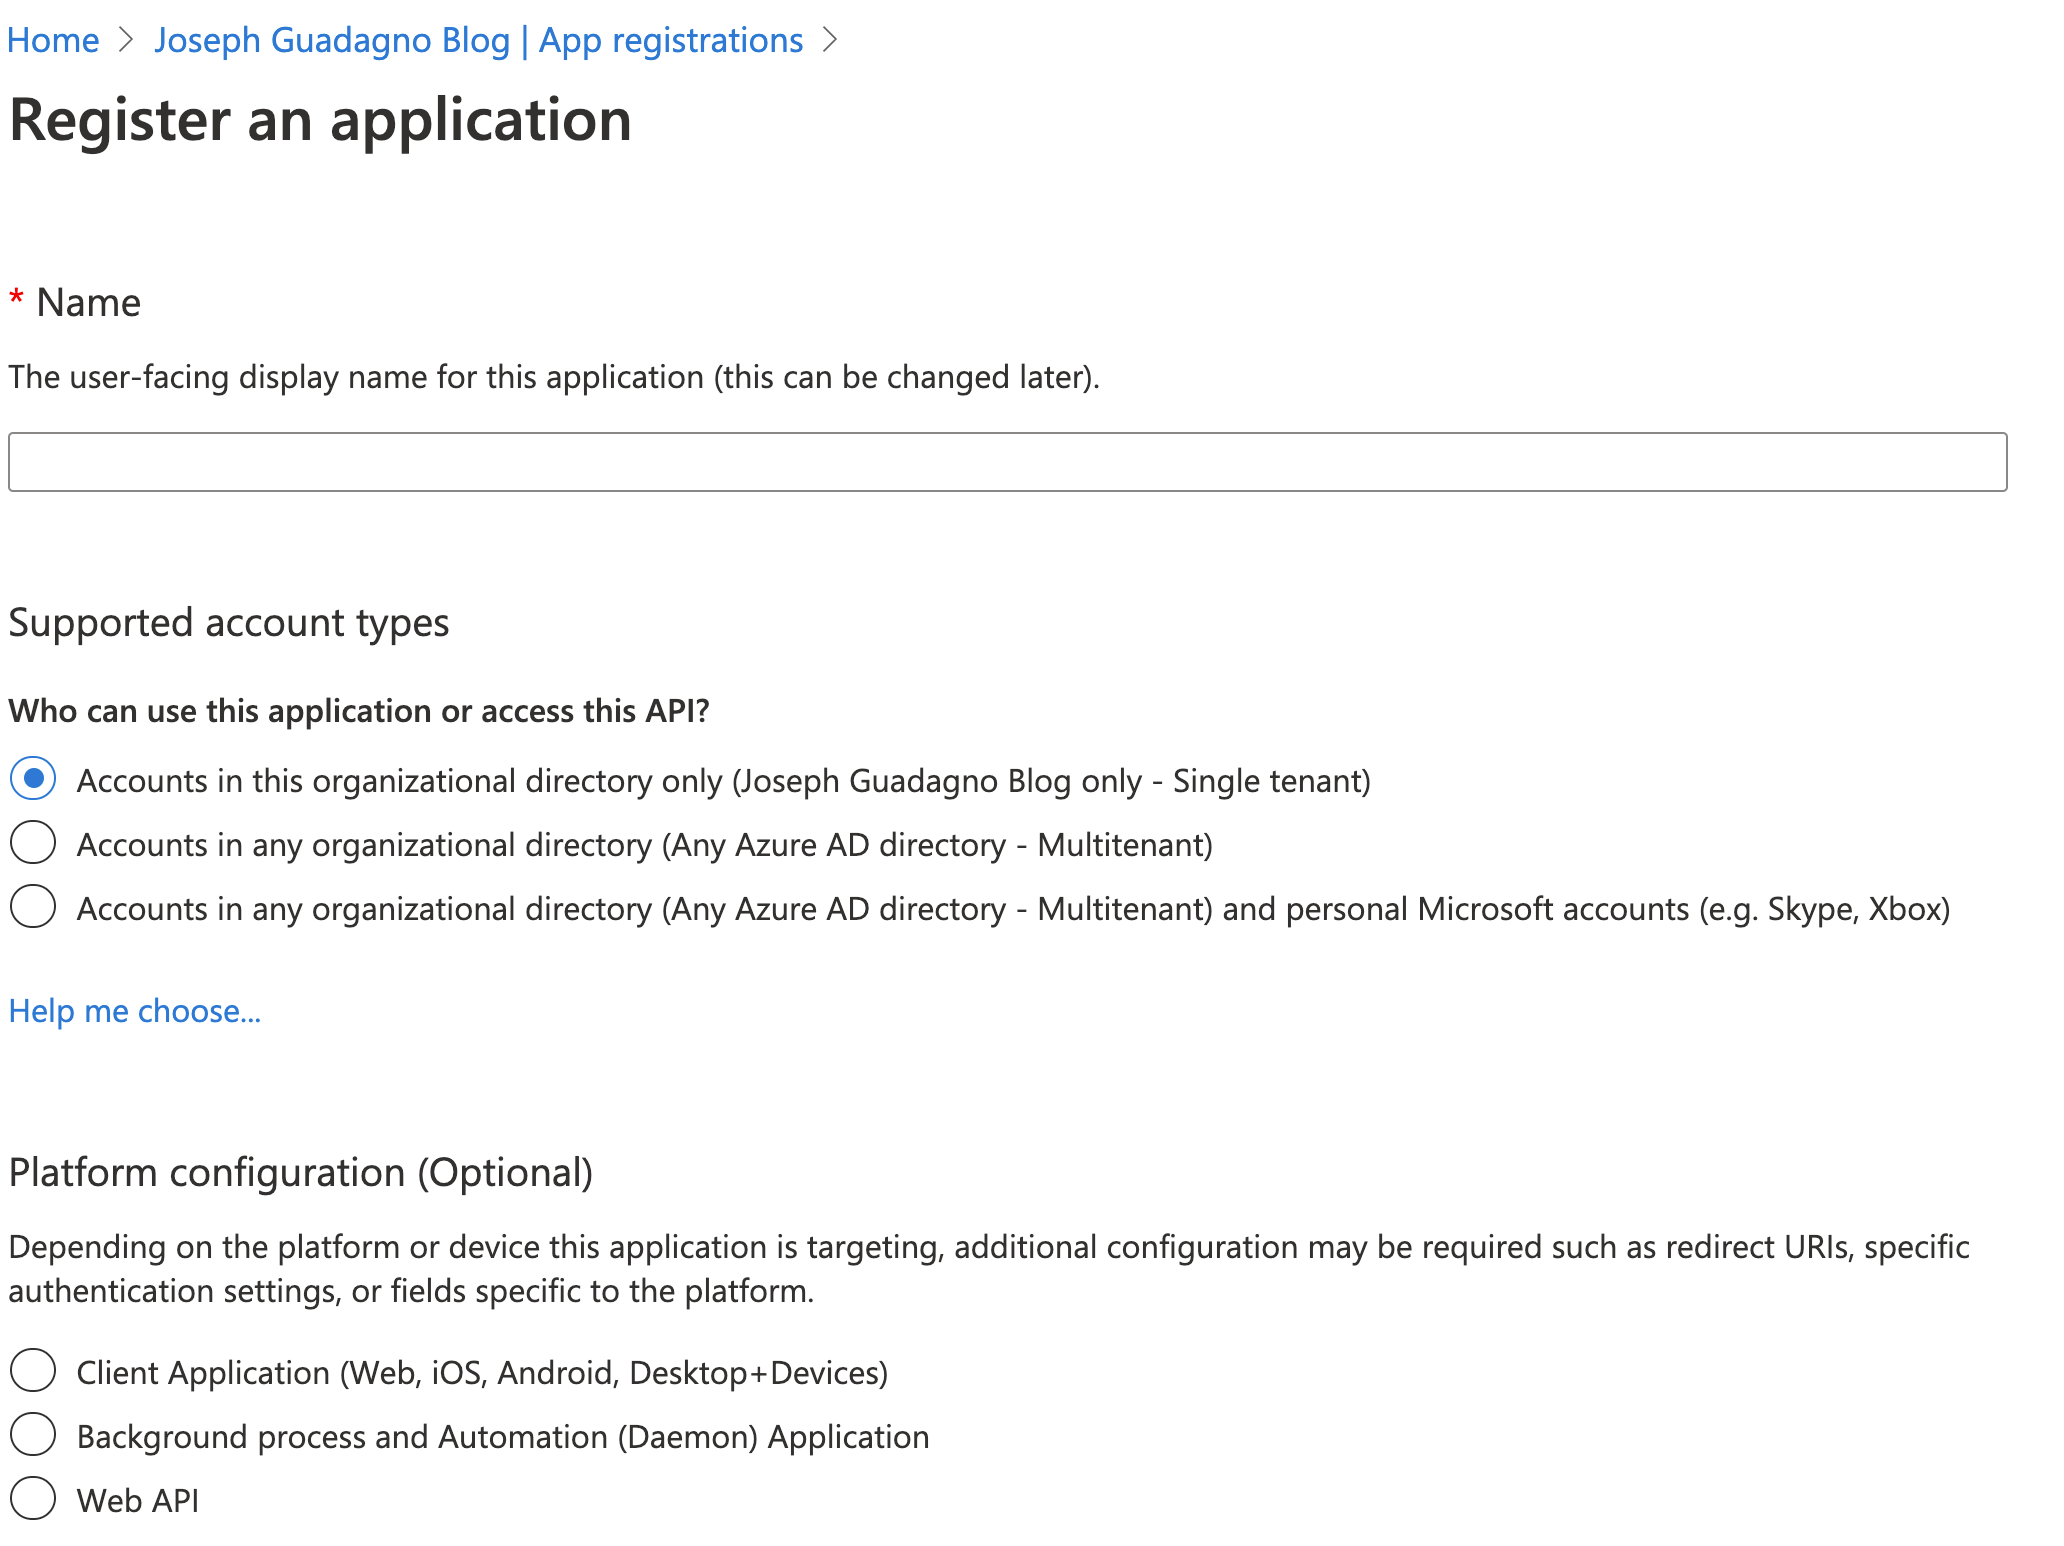
| Name | Value | Description |
| Name | my application |
The name you want to identify with this application |
| Supported account types | Accounts in any organization... |
Chose the type that fits your needs |
| Redirect URI (Optional) | This is required if you are going to be using the application to sign in. I’m leaving this blank for this application |
- Click ‘Register’
You will be presented with the information around the application. Copy down the ‘Application (client) ID’ and the ‘Directory (tenant) ID’ for use later.

- Find the ‘Certificates & secrets’ link on the menu on the left and click it.
- Click ‘+ New client secret’
- Add a description. The Azure CLI names it
rbacbut I don’t think the name matters. - Chose an expires in option.
- Copy the value.
NOTE This is your only opportunity to copy it. If you don’t, you will need to recreate it.
Next Steps
The next step would be to configure your workstation to use the credentials of the newly registered application.
Share on
Bluesky Facebook LinkedIn Reddit XLike what you read?
Please consider sponsoring this blog.

