
Getting Started with Dev Containers
Recently, I attended a session at DEVIntersections on Dev Containers presented by Burke Holland. Prior to attending the session, I knew of Development Containers, or Dev Containers for short, but didn’t understand them. This session helped me understand what they are and how to use them. I figured that I would share what I learned with you.
What are Dev Containers?
According to the Development Containers website, developer containers are:
A Development Container (or Dev Container for short) allows you to use a container as a full-featured development environment. It can be used to run an application, to separate tools, libraries, or run times needed for working with a codebase, and to aid in continuous integration and testing. Development Containers can be run locally or remotely, in a private or public cloud.
Ok, so basically, a development container uses Docker behind the scenes to create your development environment, so you don’t have to. Because I do a lot of presentations and demos using different languages and frameworks, it will allow me to have a cleaner machine, plus be able to work on multiple projects at the same time without having to worry about if I have the correct version of a language or framework installed.
Getting Started
You need three things to get started with development containers:
- Visual Studio Code
- Docker or another container engine
- Dev Containers extension for Visual Studio Code
More on getting started can be found here.
Creating a Developer Container
The Developer Container is described by a file devcontainer.json which sits in a folder called .devcontainer in the root of your project.
You can create one in Visual Studio Code
by using the command Dev Containers: Add Dev Container Configuration Files... from the Command Palette
(Ctrl+Shift+P).
NOTE: Previous versions of this extension were called Remote Containers.
You will be presented with a list of options to choose from:
| Option | Description |
|---|---|
| From a predefined container configuration definition… | Use a base configuration from the container definition registry |
| From ‘dockerfile’ | Refer to the existing ‘dockerfile’ in the container configuration |
| From ‘docker-compose’ | Refer to the existing ‘docker-compose.yml’ in the container configuration |
| Learn More | Documentation on predefined container definitions |
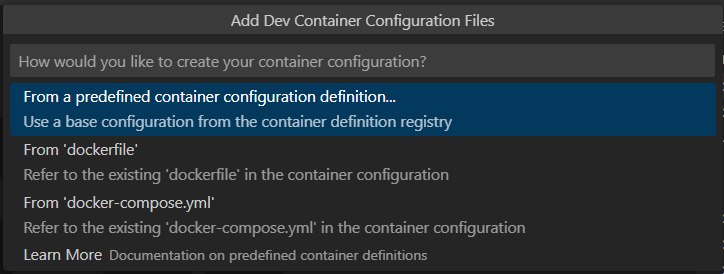
I chose the From a predefined container configuration definition... option and was presented with a list of options to choose from:
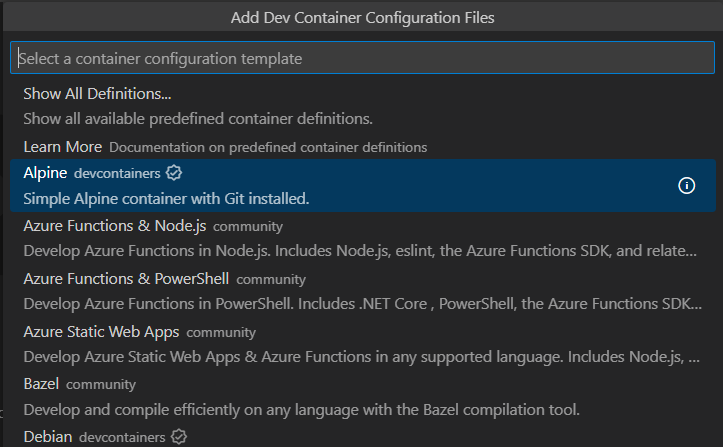
There are a lot of templates to chose from,
since I was working on my blog which is a Jekyll site,
I selected the *Show All Definitions...* option and chose Jekyll from the list.
You can see the full list of templates here.
Depending on which container template you choose, you may be presented with additional options or versions. After the version is selected you will then be prompted to Select additional features to install. Here is where you can add additional tools to your container like Git, Angular, or Node.js.
A full list of features can be found here.
In my scenario, I did not need any additional features, so I clicked Ok.
In a few seconds, the files were created, and I was ready to start working.
There was a devcontainer.json file created in the .devcontainer folder in the root of the project.
In my case, there was an extra file called post-create.sh, more on that later. The .devcontainer folder now looks like this:
1
2
3
4
5
6
7
8
9
10
11
12
13
14
15
16
17
18
19
20
21
22
23
24
25
26
27
// For format details, see https://aka.ms/devcontainer.json. For config options, see the
// README at: https://github.com/devcontainers/templates/tree/main/src/jekyll
{
 "name": "Jekyll",
 "image": "mcr.microsoft.com/devcontainers/jekyll:0-buster",

 // Features to add to the dev container. More info: https://containers.dev/features.
 // "features": {},

 // Use 'forwardPorts' to make a list of ports inside the container available locally.
 "forwardPorts": [
  // Jekyll server
  4000,
  // Live reload server
  35729
 ],

 // Use 'postCreateCommand' to run commands after the container is created.
 "postCreateCommand": "sh .devcontainer/post-create.sh"

 // Configure tool-specific properties.
 // "customizations": {},

 // Uncomment to connect as root instead. More info: https://aka.ms/dev-containers-non-root.
 // "remoteUser": "root"
}
In the first few lines, outside the comments, you will see a name and image property.
The name is the name of the template and the image is the image that will be used to create the container.
So, in this example, I am using the Jekyll template and the mcr.microsoft.com/devcontainers/jekyll:0-buster image.
Most of the other lines are specific to the type of template you chose, but are relatively common across all templates.
| Section | Description |
|---|---|
features |
This is where you can add additional tools to your container. More details |
forwardPorts |
This is where you can forward ports from the container to your local machine. |
postCreateCommand |
This is where you can run a script after the container is created. |
customizations |
This is where you can customize the instance of Visual Studio Code that will be used in the container. |
For more details on the devcontainer.json file, see the specification.
Jekyll Specific Details
For Jekyll, we need to customize a few things.
First off, we need to forward ports 4000 (Jekyll server) and 35729 (Live reload server).
This can be done by adding the following to the devcontainer.json file:
1
2
3
4
5
6
{
  "forwardPorts": [
    4000,
    35729
  ]
}
…which is outlined in lines 11-16 in the first .devcontainers.json.
Next, we need to make sure that bundler is installed and all the gems are installed.
This is done with the postCreateCommand property.
For this property, we execute the post-create.sh script that was created in the .devcontainer folder.
1
2
3
{
  "postCreateCommand": "sh .devcontainer/post-create.sh"
}
The template provides a default post-create.sh script that looks like this:
1
2
3
4
5
6
7
8
9
10
11
12
#!/bin/sh

# Install the version of Bundler.
if [ -f Gemfile.lock ] && grep "BUNDLED WITH" Gemfile.lock > /dev/null; then
    cat Gemfile.lock | tail -n 2 | grep -C2 "BUNDLED WITH" | tail -n 1 | xargs gem install bundler -v
fi

# If there's a Gemfile, then run `bundle install`
# It's assumed that the Gemfile will install Jekyll too
if [ -f Gemfile ]; then
    bundle install
fi
Customizing the Visual Studio Code Instance
The customizations property in the devcontainer.json file is where
you can customize the instance of Visual Studio Code that will be used in the container.
This is where you can add extensions, settings, and more.
For me, there are four extensions that I need to have when working with Markdown and Jekyll:
You can add them to the devcontainer.json file like this:
1
2
3
4
5
6
7
8
9
10
11
12
{
  "customizations": {
    "vscode": {
      "extensions": [
        "yzhang.markdown-all-in-one",
        "DavidAnson.vscode-markdownlint",
        "bierner.markdown-emoji",
        "streetsidesoftware.code-spell-checker"
      ]
    }
  }
}
You can also add additional settings to the customizations section.
Details on Visual Studio Code settings can be found here.
Using the Developer Container
After the .devcontainer.json file is created you will need to build the container.
You can do this by opening the Command Palette (Ctrl+Shift+P) and selecting the Dev Containers: Rebuild and Reopen in Container command.
This will build the container and open a new instance of Visual Studio Code in the container.
This will take a few minutes the first time you do it, but will be much faster after that.
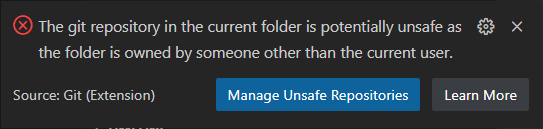
You may be prompted by a notification that says:
The git repository in the current folder is potentially unsafe as the folder is owned by someone other than the current user.* If you do get this, click onManage Unsafe Repositories and then click on repository folder.
After the container is built and the postCreateCommand script, if any, is run,
you should see a message in the terminal, “Done. Press any key to close the terminal.”.
Feel free to close the terminal and start working on your project.
Reopening the Project
Now with the .devcontainer.json file in the project, whenever you open the folder in Visual Studio Code,
it will ask you if you want to open the project in a container.
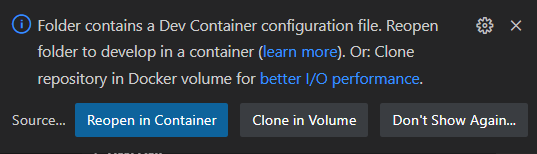
Reopen in Container, will open the container and use map the local files to the container. Clone in Volume will clone the repository into a volume and open the container. This is generally faster.
Closing the container
You can click on the green icon in the lower left corner of the window that says Dev Container:,
along with the name of the container, to close the container.
You can also open the Command Palette (Ctrl+Shift+P) and select the Remote: Close Remote Connection command.
References
Share on
Bluesky Facebook LinkedIn Reddit XLike what you read?
Please consider sponsoring this blog.

