
Enabling user authentication in Swagger using Microsoft Identity
I’ve been working on a personal project of mine called “JosephGuadagno.NET Broadcasting”. I know a terrible name, but I’ll work on a better name when it’s ready to be launched. ![]() This application is a web application that allows users to broadcast their content to their followers. One of the components of the application is an API that allows users to create and schedule their content in the application. The application is built using ASP.NET Core, Azure, Swagger, and other components. I recently secured the application using Microsoft’s MSAL library. Now, I’m going to show you how to enable user authentication in Swagger using Microsoft Identity.
This application is a web application that allows users to broadcast their content to their followers. One of the components of the application is an API that allows users to create and schedule their content in the application. The application is built using ASP.NET Core, Azure, Swagger, and other components. I recently secured the application using Microsoft’s MSAL library. Now, I’m going to show you how to enable user authentication in Swagger using Microsoft Identity.
Note: When I started creating this post, Microsoft is/was in the process of renaming Microsoft Identity to Microsoft Entra. As a result, some of the links in this post might change in the future. ![]()
Assumptions
I’m going to assume that you already have an API secured with Microsoft Identity, if not, you can check out a series I put together previously called Protecting an ASP.NET Core API with Microsoft Identity Platform.
I’m also going to assume that you already have swagger configured. If not, check out this
Configure Swagger to use Microsoft Identity
First step is to add the security requirements, AddSecurityRequirement, and security definitions, AddSecurityDefinition to the Swagger configuration.
Locate in your application code, typically in the Program.cs, the AddSwaggerGen method and add the following code:
1
2
3
4
5
6
7
8
9
10
11
12
13
14
15
16
17
18
19
20
21
22
23
24
25
26
27
28
29
30

// Enabled OAuth security in Swagger
var scopes = JosephGuadagno.Broadcasting.Domain.Scopes.ToDictionary(settings.ApiScopeUrl);
scopes.Add($"{settings.ApiScopeUrl}user_impersonation", "Access application on user behalf");
c.AddSecurityRequirement(new OpenApiSecurityRequirement() {
    {
        new OpenApiSecurityScheme {
            Reference = new OpenApiReference {
                Type = ReferenceType.SecurityScheme,
                Id = "oauth2"
            },
            Scheme = "oauth2",
            Name = "oauth2",
            In = ParameterLocation.Header
        },
        new List <string> ()
    }
});
c.AddSecurityDefinition("oauth2", new OpenApiSecurityScheme
{
    Type = SecuritySchemeType.OAuth2,
    Flows = new OpenApiOAuthFlows
    {
        Implicit = new OpenApiOAuthFlow()
        {
            AuthorizationUrl = new Uri("https://login.microsoftonline.com/common/oauth2/v2.0/authorize"),
            TokenUrl = new Uri("https://login.microsoftonline.com/common/common/v2.0/token"),
            Scopes = scopes
        }
    }
});
You can also view the code here.
Most of this code does not need to change except the scopes variable (lines 1 and 2) and the AuthorizationUrl and TokenUrl (lines 25 and 26).
The scopes variable is a dictionary that maps the scope name to the scope description. The scope description is used in the swagger UI to describe the scope. This should be a list of scopes that you want your Swagger UI to have access to.
BTW, this should only been done in a development and/or testing environment. In most cases, you will not want to enable the Swagger UI in production.
The AuthorizationUrl and TokenUrl may change depending on the tenant and/or organization type you selected when you created your application. You can find the correct values on the Register an Application page.
Get a Client Secret for Swagger UI
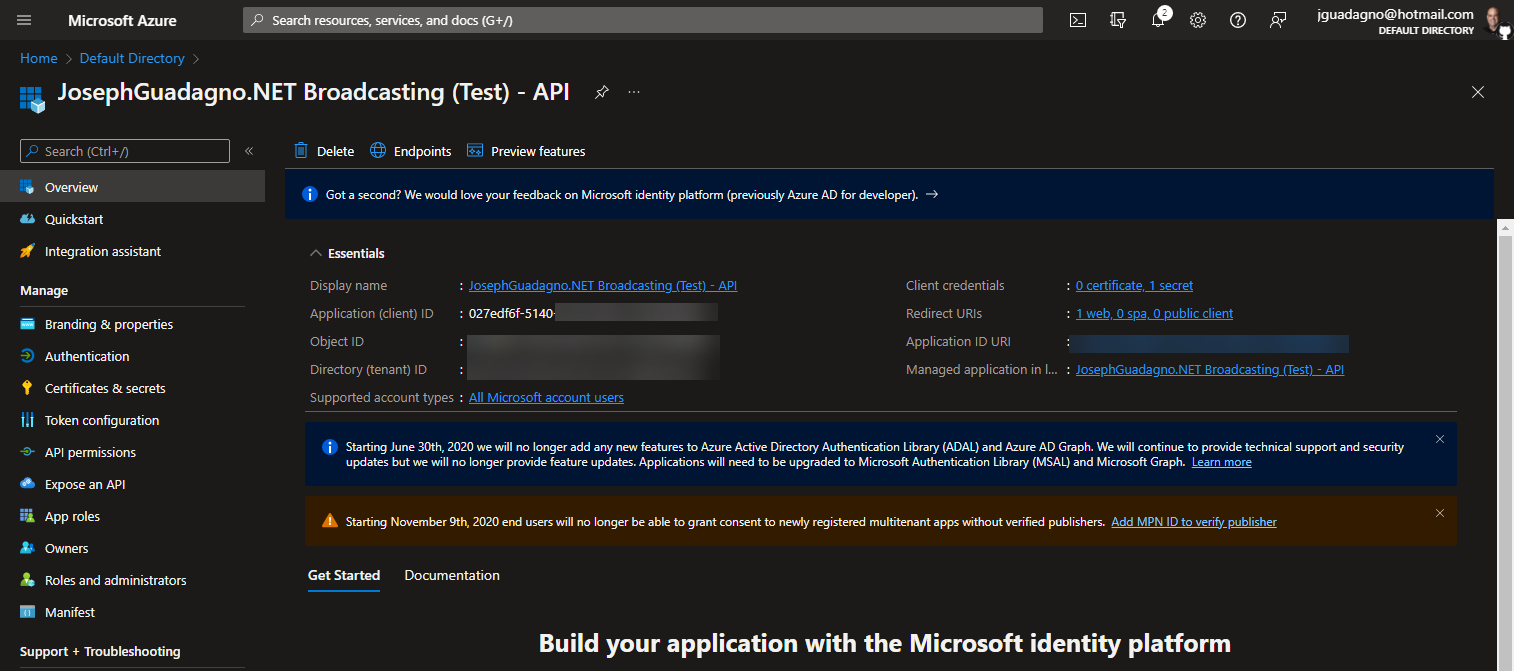
First, we’ll need to get client secret for the Swagger UI so that the application can authenticate users to the API. We will need to go to the application in the whichever Azure Active Directory it is registered in. In this example, I have an application named “JosephGuadagno.NET Broadcasting (Test) - API” registered in my Default Directory.
Now let’s see how to get the client secret.
- Navigate to the Azure Portal
- Navigate to the respective directory. Default Directory in this example.
- Click on App registrations
- Click the application for the API
You should see something similar to the following:
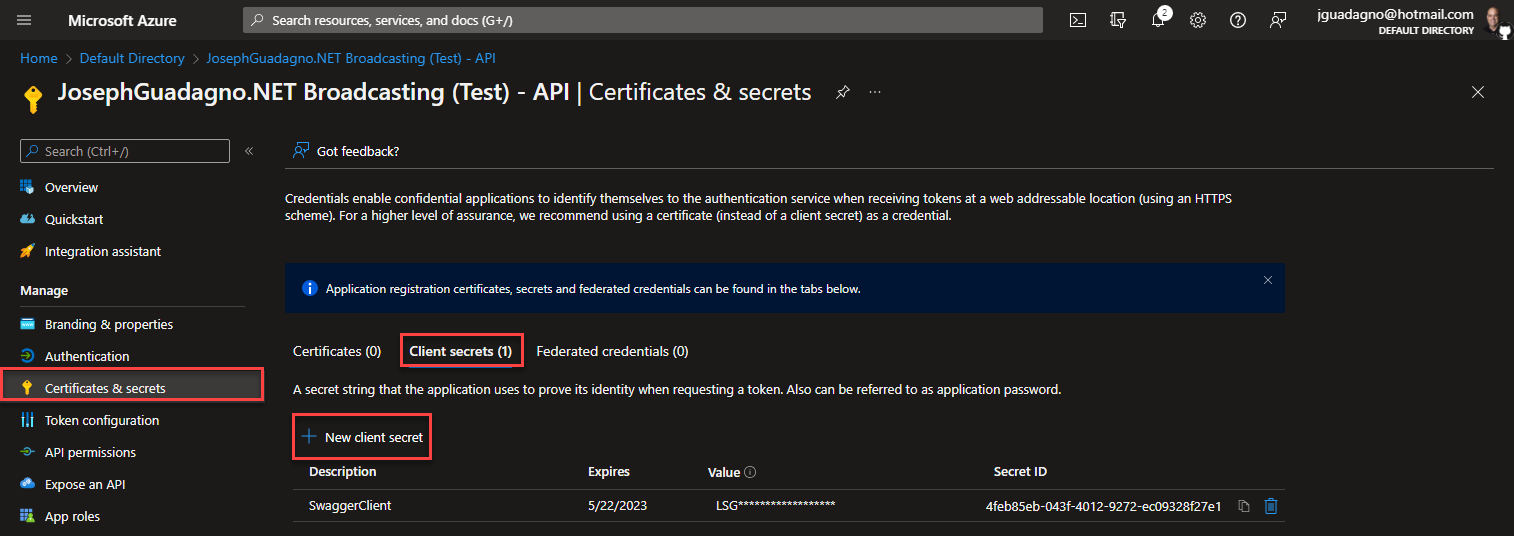
Next, click on the Certificates & secrets menu item. After that, click on the Client Secrets tab item, then + New client secret. All highlighted in red in the image below.
In the dialog box that follows, enter the following:
| Field | Description | Value |
| Description | A description of the client | SwaggerClient |
| Expires | How long the client secret will be valid for | 6 months |
- Click Add
After it is done creating the client secret, you should see something similar to the following:
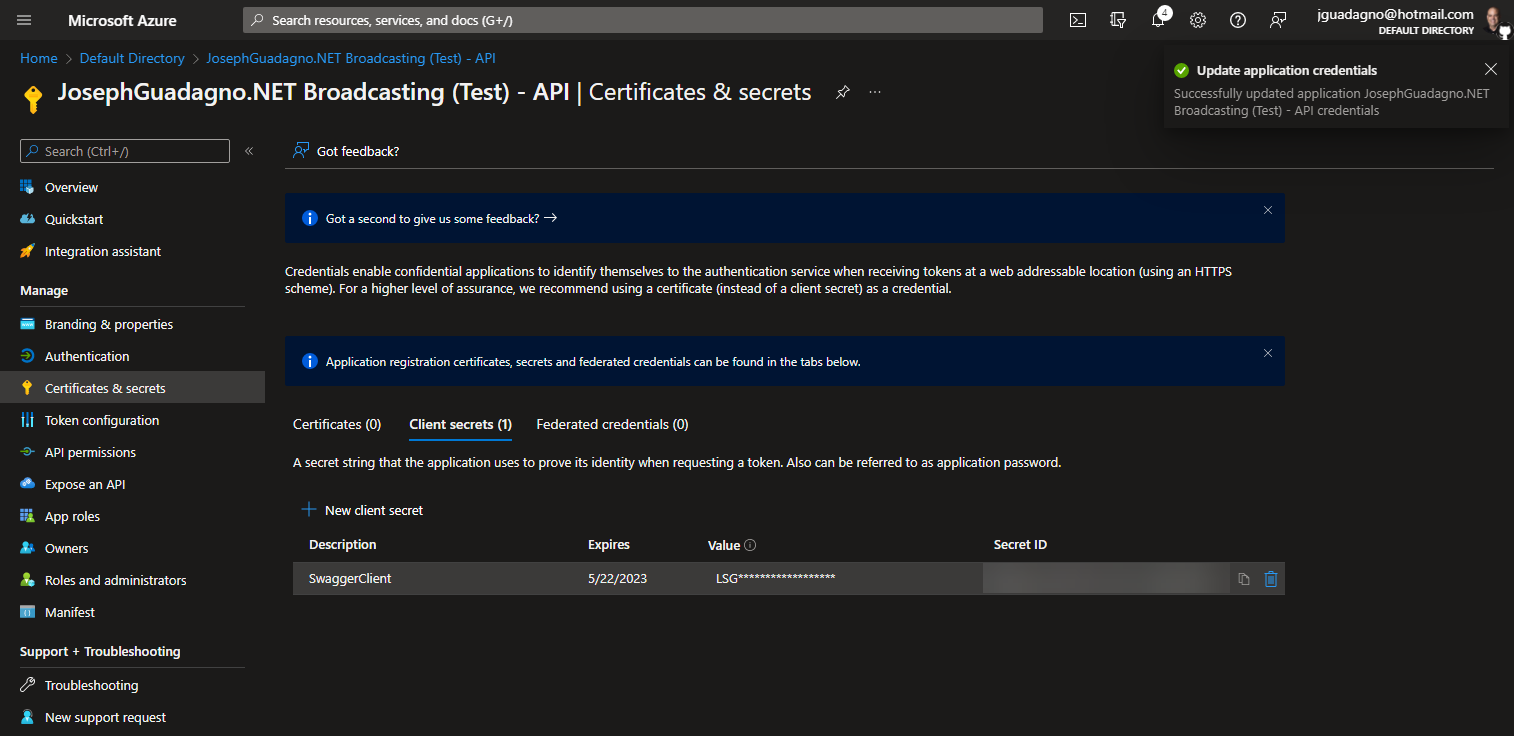
NOTE: Copy the client secret and store it securely. You’ll need it for the next step and once this blade closes, you cannot access the client secret again.
Enable Swagger UI to use Microsoft Identity
Locate in your code the UseSwaggerUI method and add the following code:
1
2
3
4
5
6
7

app.UseSwaggerUI(options =>
{
    options.OAuthAppName("Swagger Client");
    options.OAuthClientId("<Your client id>");
    options.OAuthClientSecret("<Your client secret>");
    options.OAuthUseBasicAuthenticationWithAccessCodeGrant();
});
Now, you’ll need to replace the <Your client id> with the client id of the registered application. In the example above it is labeled as Application (client) ID and starts with 027edf. The <Your client secret> is the client secret you copied earlier.
Testing out the Swagger UI
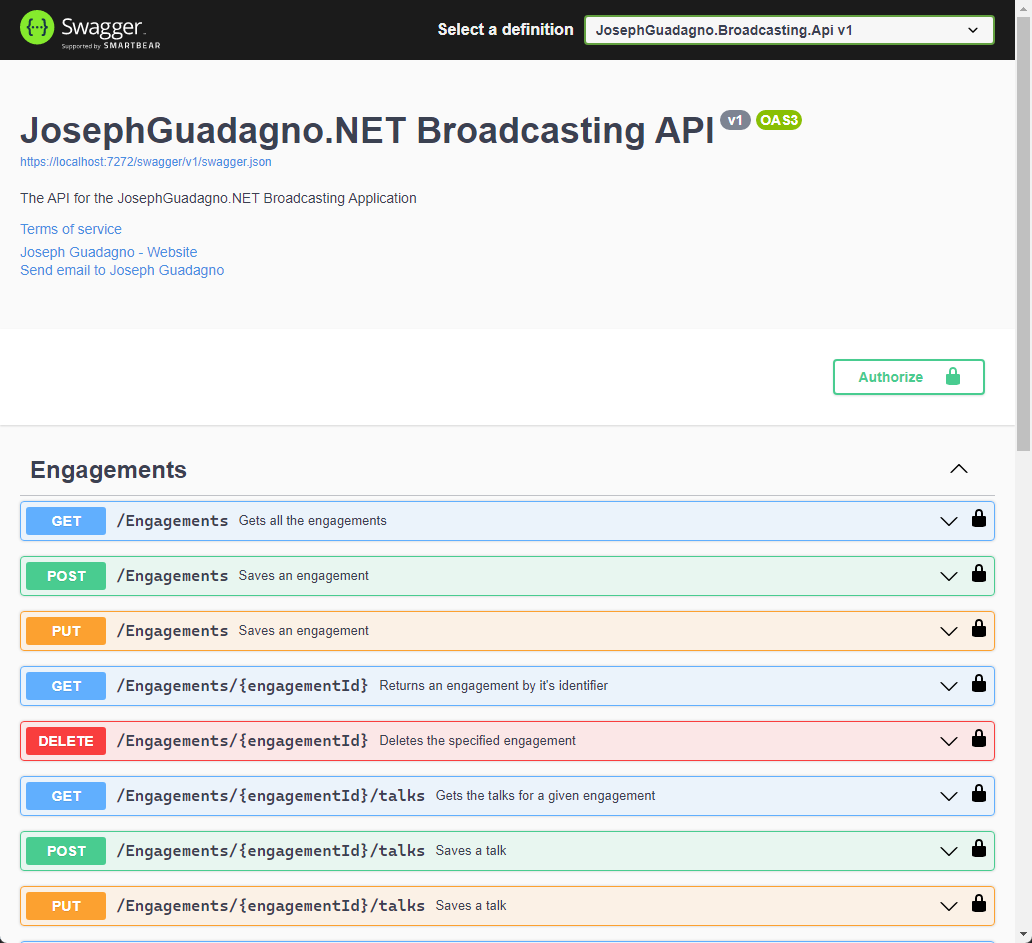
If everything is configured correctly, once you start your API and navigate to the Swagger UI, you should see something similar to the following:
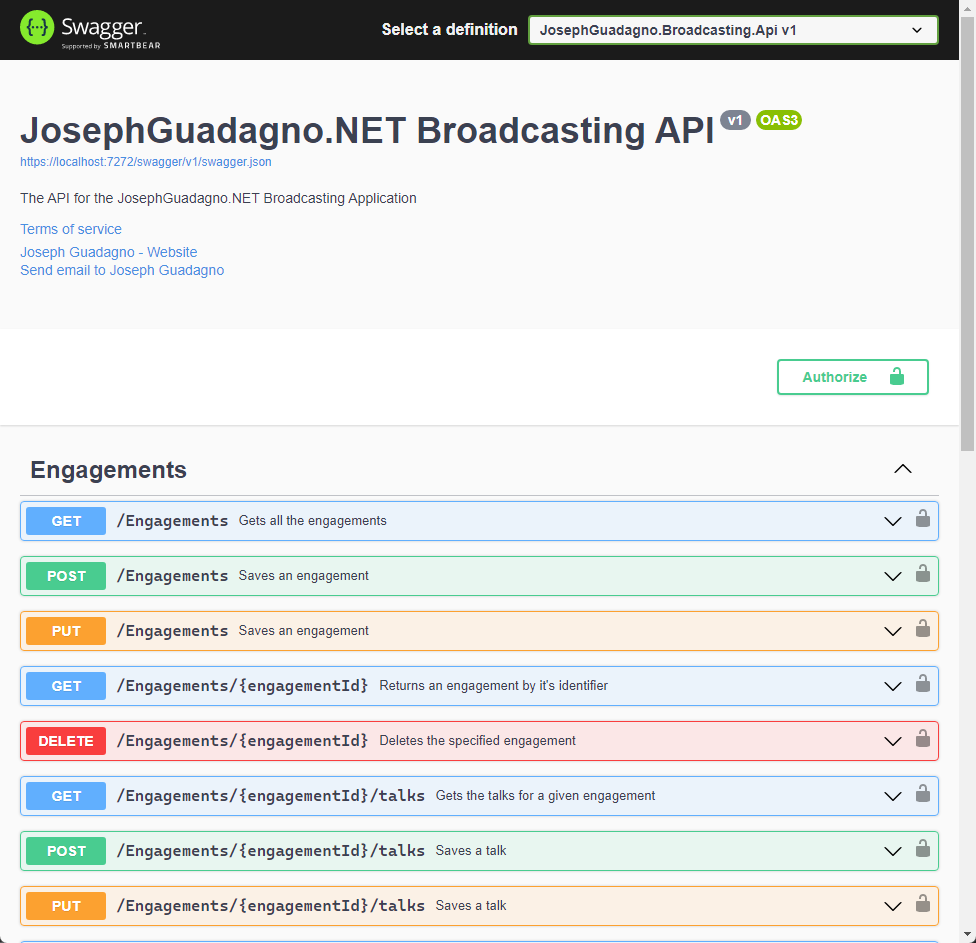
Clicking on the Authorize button will bring up a page showing you some information about the application, including the name, authorization url, client_id, and scopes being requested.
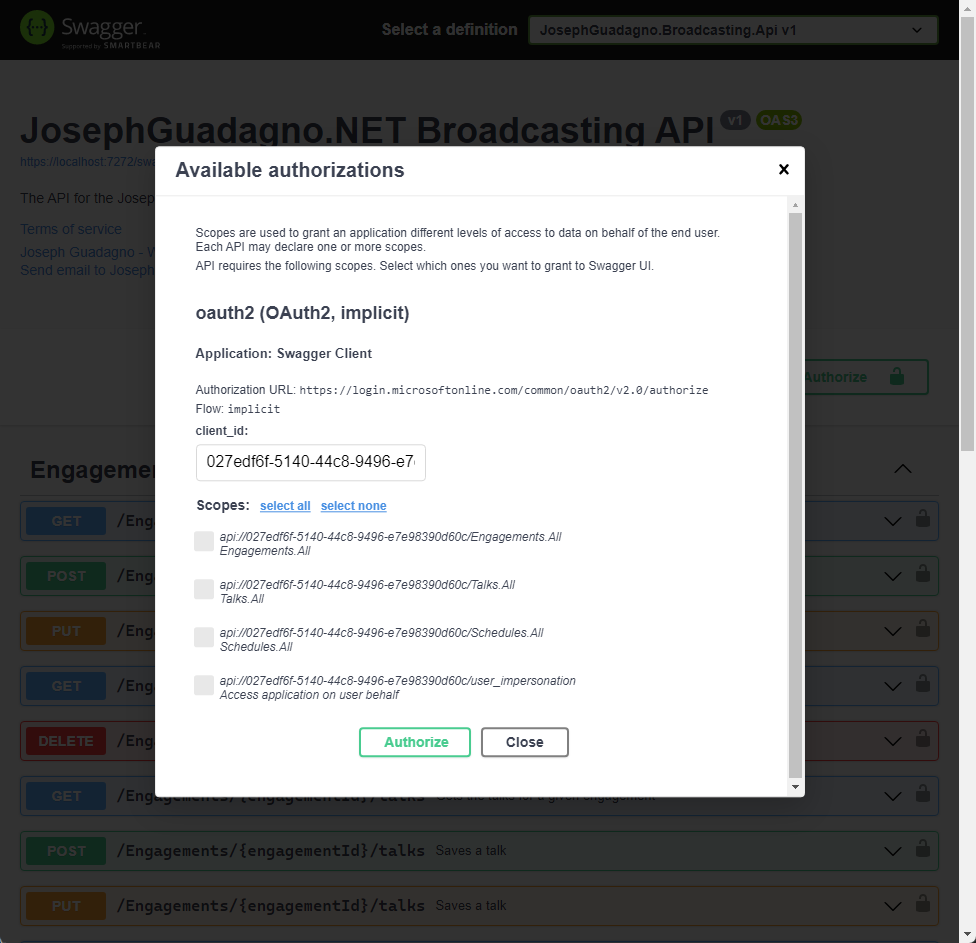
- Select all the permissions that you want to test
- Click the
Authorizebutton to start the sign in process.
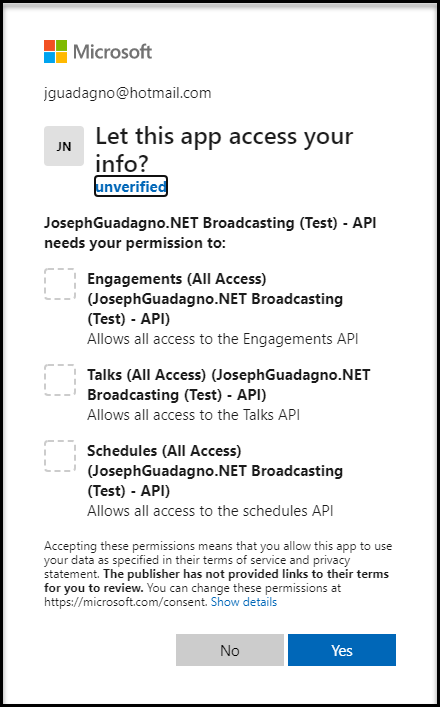
The Microsoft Identity will redirect you to the authorization url. Once you are redirected, you will be able to sign in with your Microsoft account. And you will be presented with a page that shows you the permissions that you have selected and allows you to authorize this application to access those permissions.
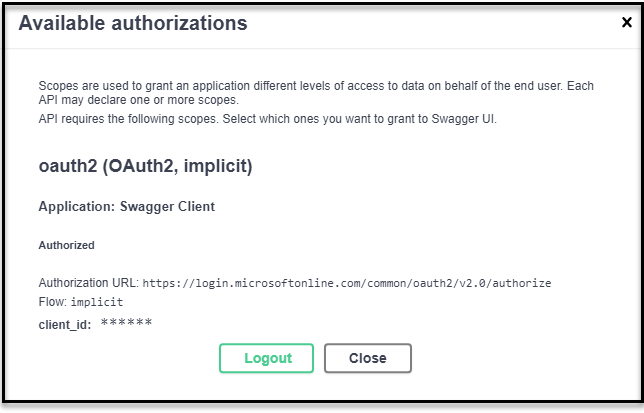
The Swagger UI will let you know that it received the authorization.
Now the Swagger UI will look like this:
Wrap Up
So with a little work, we can see how easy it is to use the Swagger UI to authenticate users to the API. This is a great way to test out the API and make sure that it is working as expected.
Most of the code here can be just copied and pasted into future projects. The only thing you would need to do is tweak the scopes and update the client id/secret.
References
Share on
Bluesky Facebook LinkedIn Reddit XLike what you read?
Please consider sponsoring this blog.

