
Speed up Creating Code with Live Templates in JetBrains Rider or ReSharper
For the past few weekends, I’ve been working rebuilding a library I wrote to make it easier to use Azure Storage. I started this library about 4 or 5 years ago, and it did not have ‘true’ unit tests. I’m not going to talk about what makes a good unit test and what doesn’t. There are plenty of posts around that! I decided to rewrite all of the tests and move to xUnit. After creating about the 50th test or so, I noticed a pattern in the initial shell of the tests. Most of the tests looked like this.
1
2
3
4
5
6
7
8
9
10

[Fact]
public void MethodName_WithSomething_ShouldDoSomething()
{
    // Arrange

    // Act

    // Assert
    Assert.True(false);
}
I’ve been a user of JetBrains ReSharper (a Visual Studio extension that makes Visual Studio better) for 9 or so years, maybe longer, and a user of JetBrains Rider (cross platform .NET IDE), for about 3 months now, and they both have a feature called Live Templates. Live templates provide you with the ability to create templates for code you often type. These are similar to snippets in Visual Studio but stronger. So to I solved my repeating the same code to start a unit tests with a live code template.
Viewing Existing Templates
How you get to viewing or creating the existing templates varies depending on whether you are on a Mac or a Windows and using ReSharper or Rider. For both Rider and ReSharper, Live Templates are available in the settings/options.
Here is what the Live Template settings looks like.
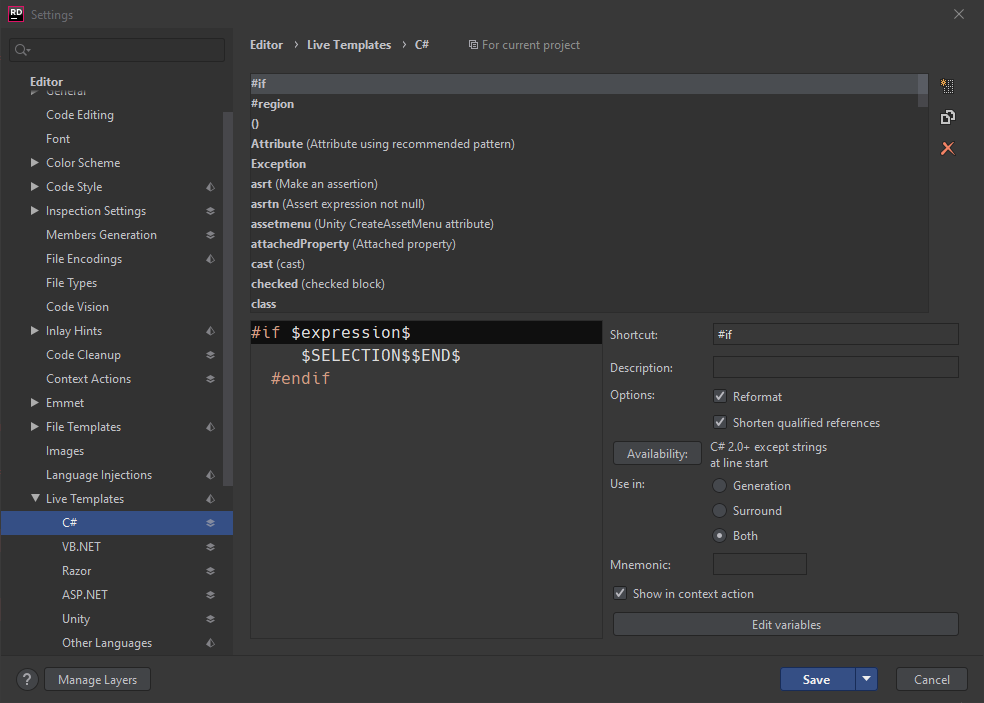
Template Dialog Box Explained
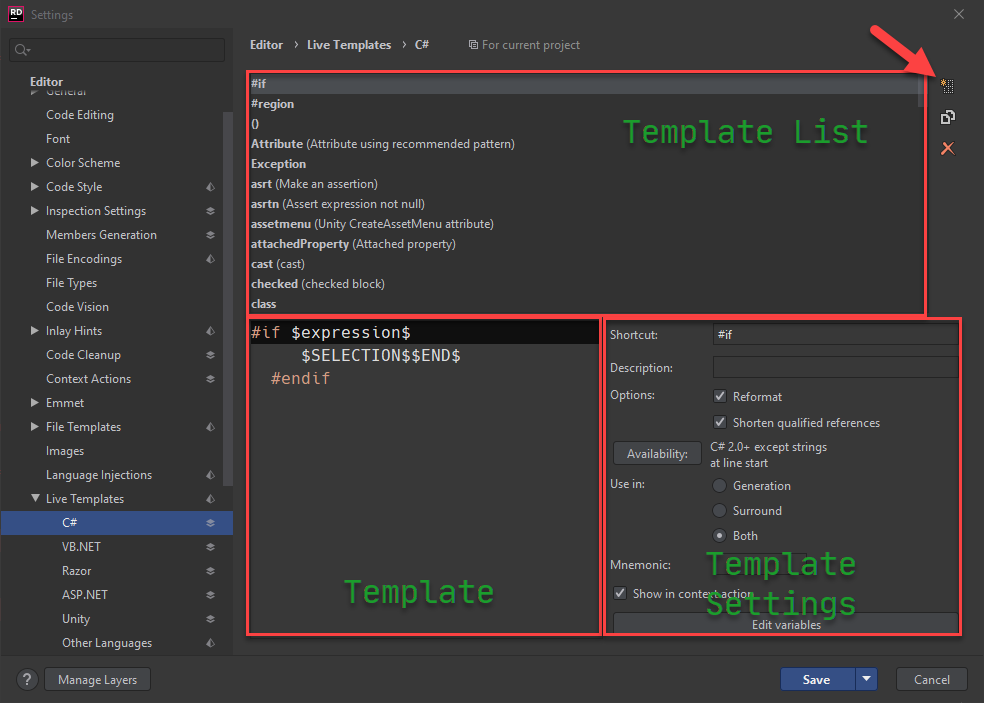
The ‘Template List’ is where you will find all of the templates for the given language.
Clicking on a template will show you the template in the area I named ‘Template’. I know original naming ![]() . Ignore the dollar signs ($) for a second.
. Ignore the dollar signs ($) for a second.
The ‘Template Settings’ displays the settings for the template. I know I’m being original again ![]() .
.
Creating a New Template
To create a template, you will need to click on the ‘New Template’ icon in the upper right-hand corner, the one with a star on the table-like grid (follow the arrow in the image above). Make sure you are in the language of choice first. That’s right, and you can create a template for any language that Rider/ReSharper support. Oh, as a bonus, you can edit existing ones if you prefer. As another bonus, if you have Preference Sync turned on, the template changes will be available in all instances of your application on any device.
After you click new, the ‘Template’ and ‘Template Settings’ will be set to the defaults. For my fact template, I added the following for the template.
1
2
3
4
5
6
7
8
9
10

[Fact]
public void $MethodName$_With$What$_Should$DoWhat$()
{
    // Arrange
    $END$
    // Act

    // Assert
    Assert.True(false);
}
What are those dollar signs ($) for you ask? Well, I am glad you asked. The dollar signs are used for variables/inputs/prompts for your template. In this example, I have 4, $MethodName$, $What$, $DoWhat$, and $END$. So, in Rider/Visual Studio, when I enable the template, I will be prompted inline for the $MethodName$, then $What$, then $DoWhat$. The $END$ indicates where the editing caret should end when you are complete with editing all the variables. The names matter as much as naming your methods or variables in code. They should reference what they are doing or expecting. For my unit test, the first variable is MethodName, which is the method I am testing, followed by What the tests expect as input, then followed up with the test should DoWhat, and the template Ends in a position where I can start arranging the tests.
Now, I can expand this a little bit more with some ‘smarts’ from the IDE by adding live template functions but that maybe another blog posts.
Template Settings
This is where you can tweak the settings a bit
| Name | Used For |
| Shortcut | This is what you type in the editor to use this snippet. This also appears in the Intellisense lists |
| Description | A description of the template. This is helpful to explain what the template does for others |
| Use in |
Generation means the creation of new code. Surround is used when you have selected code that you want to surround, like adding a try/catch. |
| Mnemonic | If your template name is long, you can specify what letters to use to select it. |
Wrap Up
There are a lot of things that you can do with live templates. I urge you to take a look at them. I know they have saved me some time, except for writing this blog post ![]() .
.
Further Resources
Share on
Bluesky Facebook LinkedIn Reddit XLike what you read?
Please consider sponsoring this blog.

